
Get ready for a series of before & afters’s from my very own little corner of the world. When I moved into my loft over 4 years ago it was the ultimate bachelor pad and the colour palette on the walls was beige, dark green & maroon.(gross)
There is no better motivation than hosting a New Years Eve party to get the place set up in the first three months but the truth is I haven’t done much since then. I recently made one pretty dramatic change (project to come) and that really motivated me to get some of those other things checked off my ‘to do’ list.
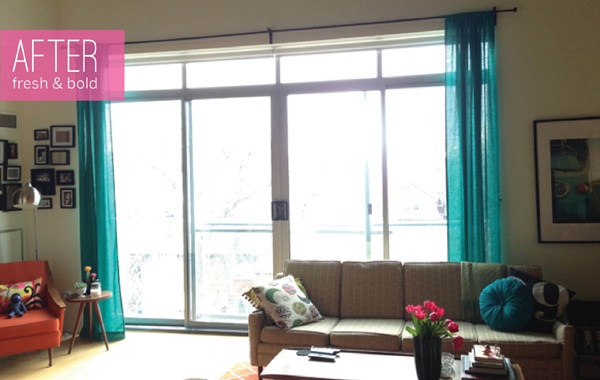
First up is a curtain makeover. And by makeover, I mean brand new & totally different curtains. I’ve hated these dark brown velvet curtains since the day I moved in but because of the light/size/height issue I haven’t done anything. Until now.
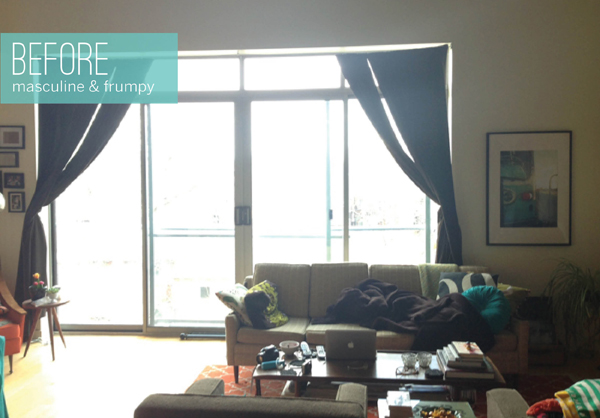
I went all out DIY on this and made my own curtains (!!!!). The truth is it was hard to find anything 120″ long and what I found was pretty ugly. I was very inspired by these curtains and decided to try and make them myself.
First step – go to the fabric store. Thanks King’s Textile in Toronto who have any possible fabric you can think of. Lucky me I found pretty much the exact turquoise gauze-like material in the clearance bin for $3.99. What are the chances?!


3 responses to “BEFORE & AFTER: curtain makeover”
Looks amazeballs! Nice work!
[…] curtains earlier and because it was so hard to find pre-made ones in the length I needed I ended up making my own for under […]
This looks very amazing. The color of the blinds is very beautiful and eye-catching.