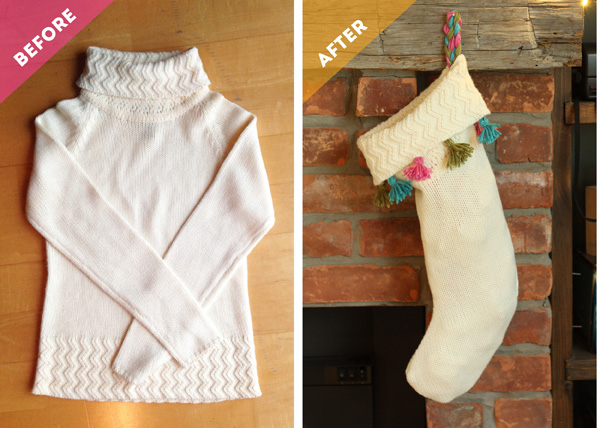
Following on the tail of yesterday’s project, I have another thrifty upcycling project. This funky stocking used to be a $5 sweater from the thrift shop. For real! Keep reading to see how I did it and get ready to transform your thrifted find into a sweater stocking ready to be stuffed with holiday goodies.
Here is what the sweater looked like before. Ok, so it wasn’t all that ugly but it was kinda boring. I think it will have a much better life as a funky and stylish holiday stocking. Don’t you agree?
 I know I say this all the time, but this was a relatively simple project. You’ll need a sewing machine, but only very basic sewing skills. Take a look at these singer sewing machine reviews to find a good one if you don’t have a machine already.
WHAT YOU NEED:
– old sweater
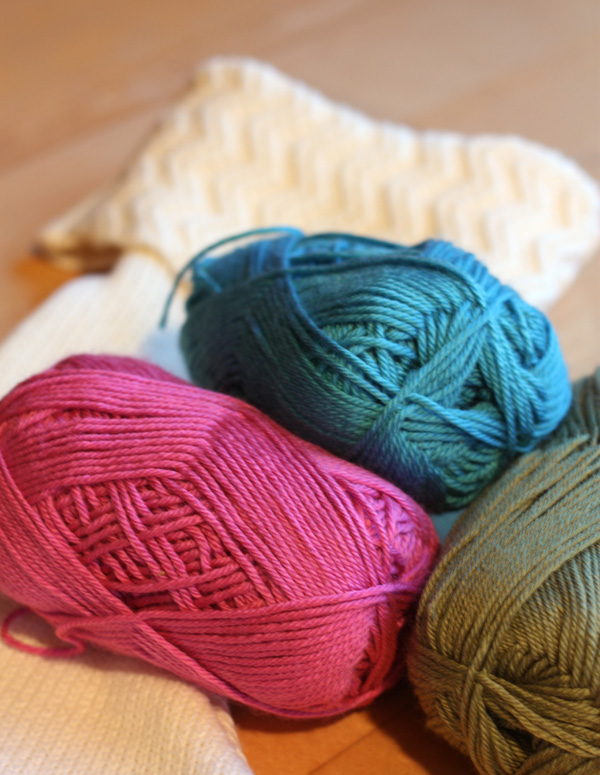
– yarn, colours of your choice
– needle & thread
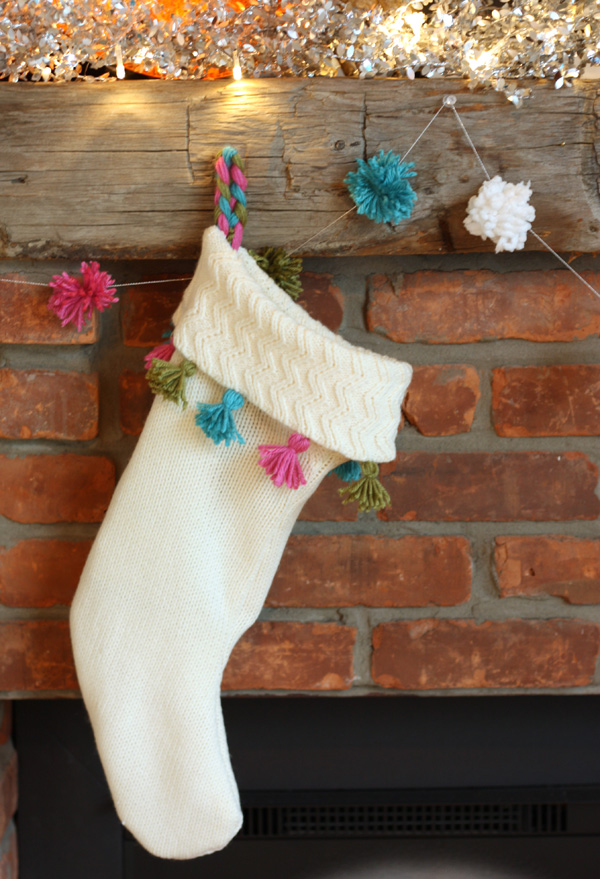
First let’s make the stocking part. I purposely chose a sweater with a great neck to be the top of the stocking. Keep this in mind when you’re picking a sweater. Remember to do the sewing with the material inside out.
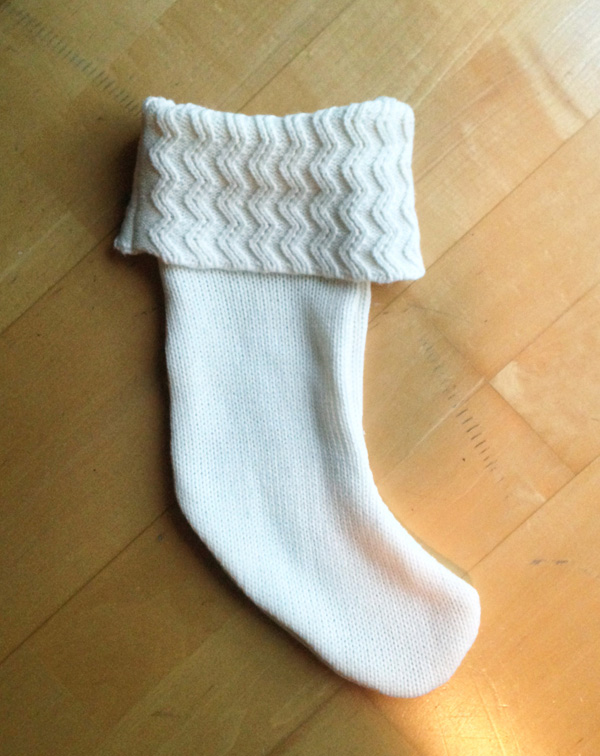
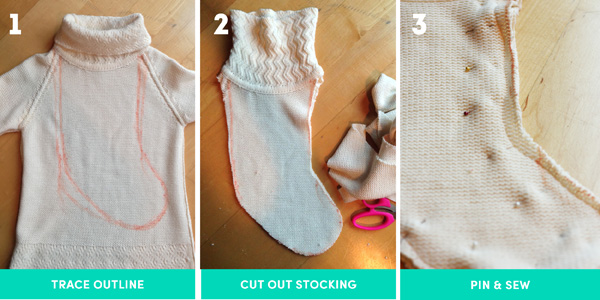 When you turn your creation right side out, you magically have a great looking stocking.
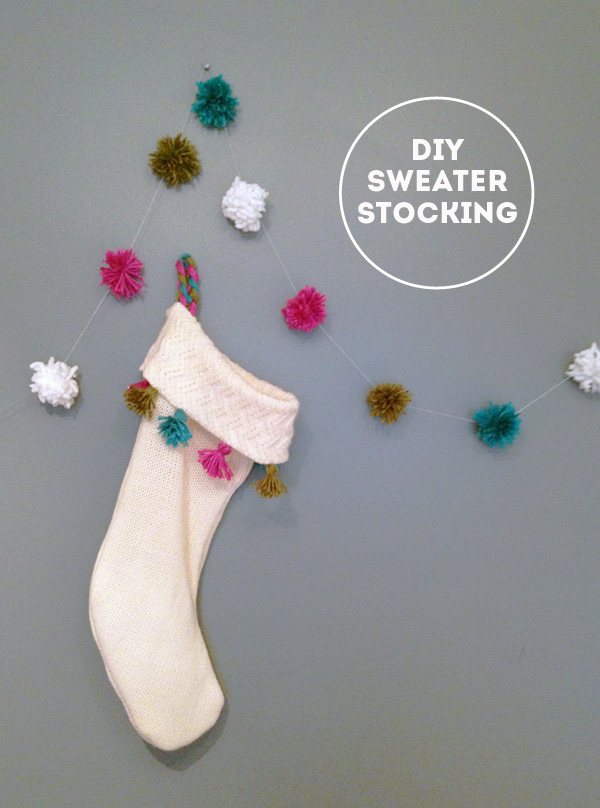
 Next you want to make the tassels & braided hanging hoop. Pick your favourite holiday colour combo. I’m doing a bright & fresh colour theme this year.
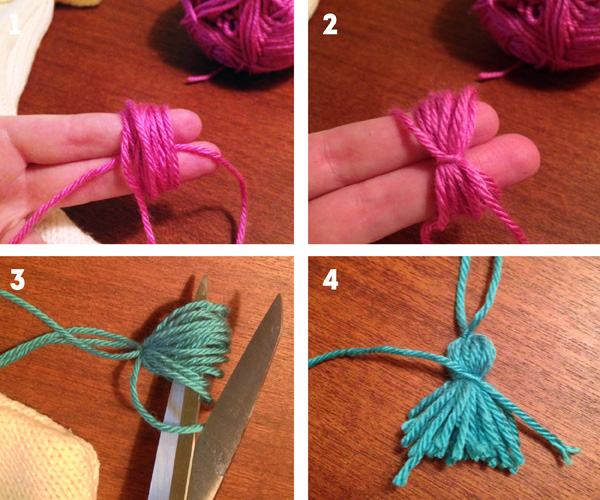
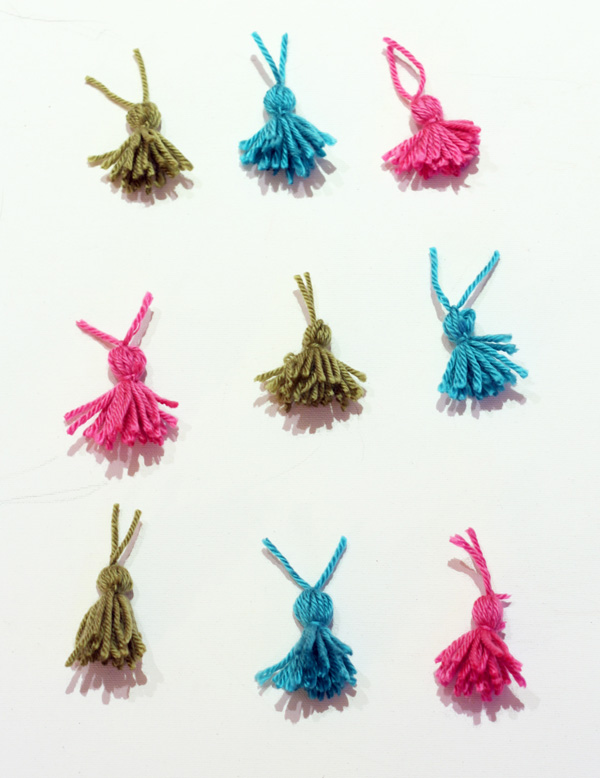
 Then roughly figure out how far apart you want the tassels and measure out how many you’ll need. This will differ depending on the size of your stocking. Follow these simple steps to make the tassels. It’s ok to trim after with scissors to make them look better…no one needs to know.
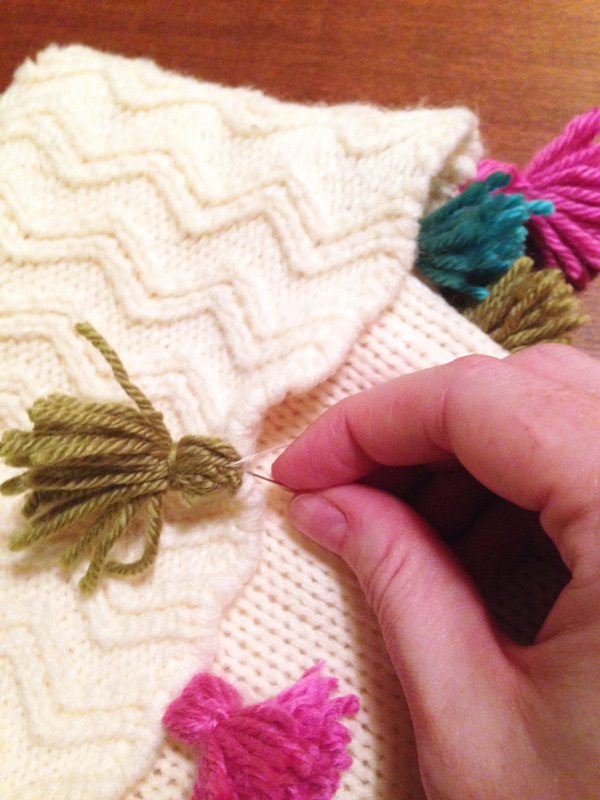
 Then you take your needle & thread and do some old fashioned sewing.
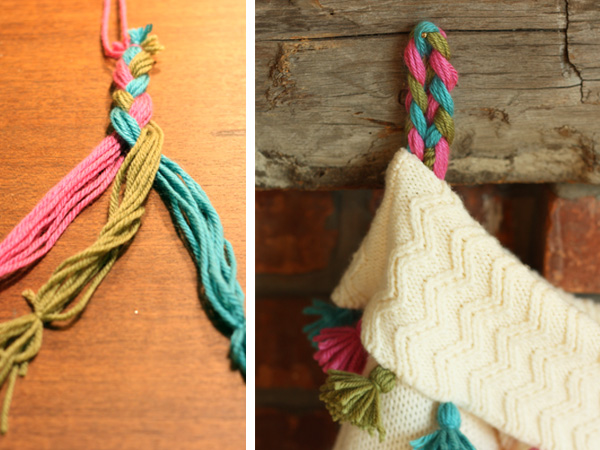
 To add more colour and even more interest, make a braided rope to use as a hanging hoop. It’s a small detail but adds so much more interest.
Finally, sit back and enjoy your masterpiece while you patiently wait for it to be filled by Santa.