
Who doesn’t love ice-cream, seriously? (lactose free people, you don’t count). Ice cream sandwiches always remind me of my grandma. She was a very simple woman and her freezer was almost always empty except for a box of ice-cream sandwiches for when we came to visit. I thought I would try a special Spring colour take on the classic ice-cream sandwich. Maybe you’re hosting a family Easter get together or just want to try something fun for the kiddos or a spring themed party.
It’s super simple, you only need three things for this recipe:
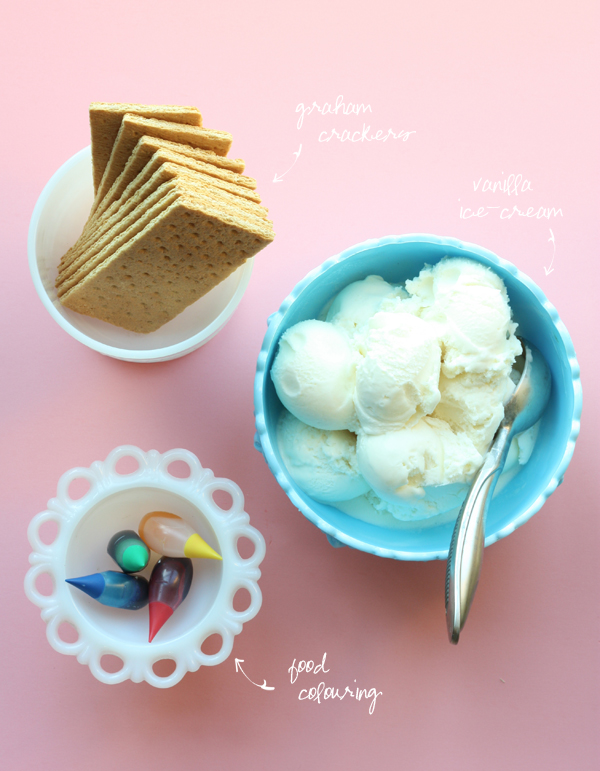
Pretty simple huh? This recipe is very easy but it is a bit time consuming just because you’re working with ice-cream and you have to return it to the freezer between each step so that it doesn’t totally melt on you.
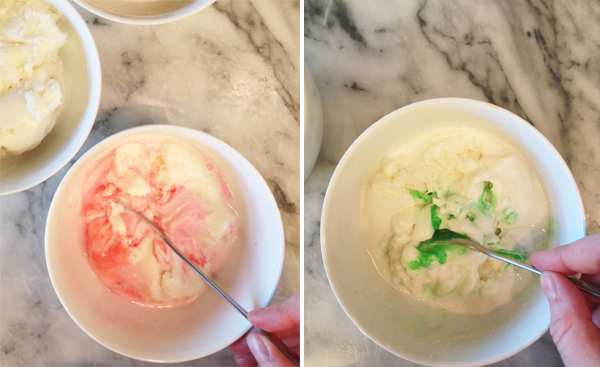
Remember how you were told to never play with your food? Well forget that. The first step is to play with your food. Separate your vanilla ice-cream into as many bowls as you want colours. I would say you need about 1.5 cups of ice-cream for each sandwich. If you want to make it even more simple, you can stick to one colour and then you don’t have to worry about portions.
Then you play with your food colouring and mix up some different colours. Or as I used to say as a kid “make some ice-cream soup”.
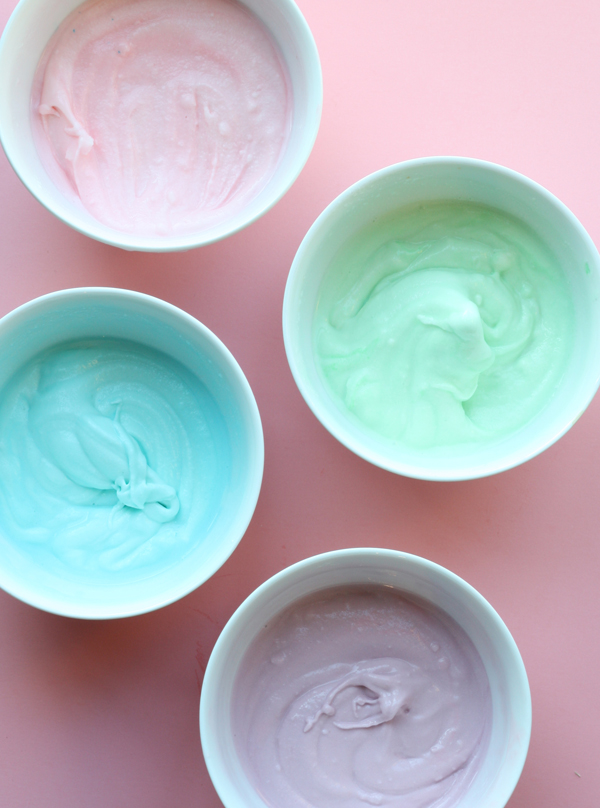
Once you’re happy with your colours, put the ice-cream back in the freezer to harden for at least an hour. You’ll end up with something like this.
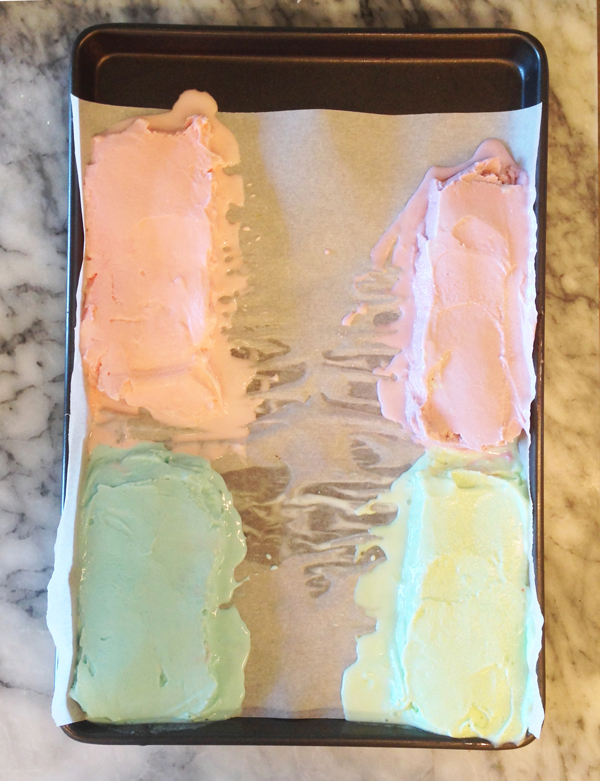
So this is my first time trying something like this and if you have a better idea or better tools for this next step, then by all means do it your way (and please share!). Scoop out the amount for each sandwich and place them on a parchment lined baking sheet, right up against the edge. Let the ice-cream soften a bit so you can smooth it out to create flat-like rectangles. It definitely doesn’t look super pretty at this point but stay with me.
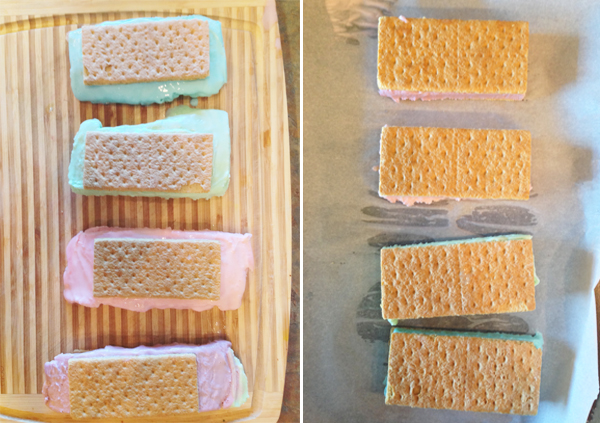
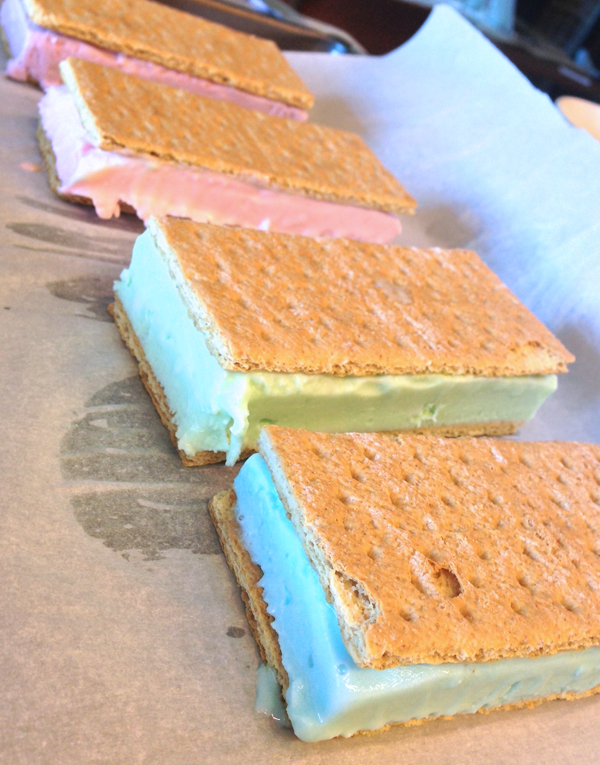
 Put the tray back in the freezer to let the ice-cream harden again for at least an hour. Then when they’re hard, carefully sandwich them between your graham crackers. The parchment should peel away easily if you let the ice-cream harden. You’ll get a very rough looking ice-cream sandwich (below left). This is where you take a nice large sharp knife and some room temperature water and carefully trim off the rough edges and then you’ll have your pretty looking ice-cream sandwiches.
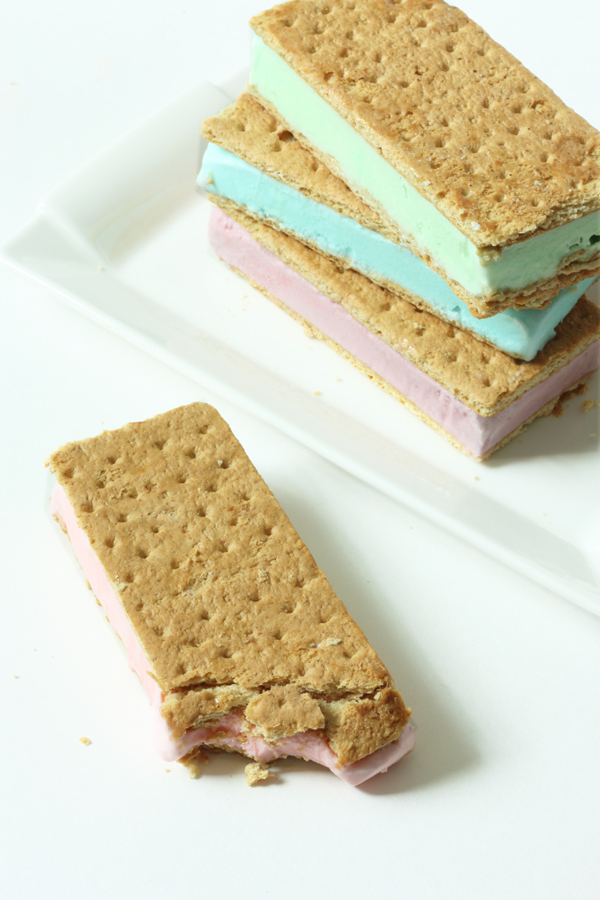
 Now you’re done! I would suggest returning them to the freezer one last time to get them nice and firm before you serve them. If you’re not serving them within the same day, just stick them in a covered tupperware container.

Don’t they look so delicious? And of course pretty. You can have fun with colours and make them match any theme or palette for a birthday party or summer BBQ or even a baby or wedding shower. Yum!
If you liked this recipe, check out out our Good Eats category for more.
One response to “GOOD EATS: colourful ice-cream sandwich treats”
Wow – this is food porn at its best. Simply beautiful!!!