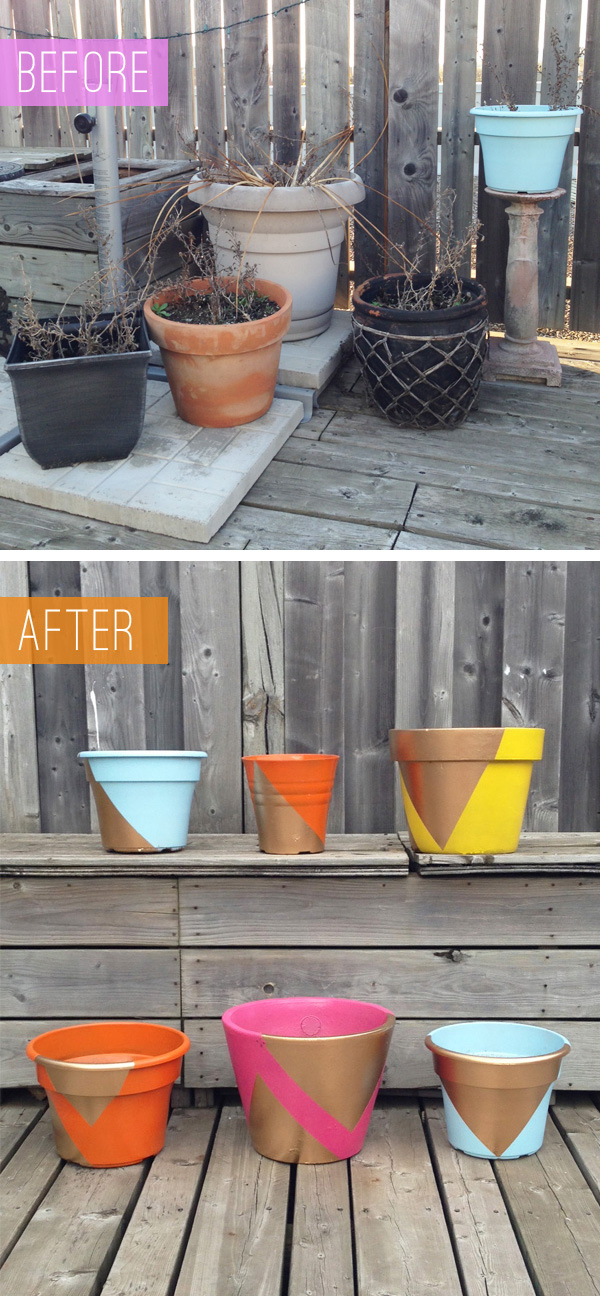
I’ve been getting a bunch of interest in this before & after from last year’s Patio Beautification project so I thought it was worth a re-visit. In Canada it can be hard to justify spending a bunch of money on an outdoor space because the season is so short and many people don’t have proper year long storage for their outdoor pieces. That’s the case for me anyway. The result is a bunch of really sad mix matched and weathered planters. I decided that instead of buying new ones (not in the budget) or tossing them I would give my sad, sad looking pots a makeover. Oh spray paint and painters tape how can I express my love for you?
WHAT YOU’LL NEED:
• some old (or new) pots
• spray paint in your favourite colours & gold
• painters tape
• plastic bags to cut up
• drop sheet
• (optional but helpful) some sort of pedestal or table that you don’t mind getting painted
First – pick up a few of your favourite colours of spray paint as well as a bottle of gold.

Set up your drop cloth and start spraying. I suggest a calm day with no wind. You’ll likely need at least two coats to cover nicely.

Give them some time to dry (I left them for a day) then use your painters tape and cut up plastic bags to tape off your geometric shapes. I stuck with triangles.

Once you have them all taped up it’s time for a little gold to make them look rich. You’ll end up with something like this. Give them two coats for good coverage. Then let them dry to the touch but not overnight because that green tape can end up taking some paint off with it if you leave it on too long.

Then comes the best part – carefully remove the tape and check out your new, modern, geometric, colourful and awesome pots!

4 responses to “BEFORE & AFTER: patio planter makeover”
They look awesome! Much better!
They look fantastic!
Thanks! They definitely got a second life.
[…] The Sweetest Occasion gave these plastic patio planters an update with some spray paint. I just love the metallic gold […]