Happy new year all! So what will the first post of 2015 be about? My kitchen makeover that started in Feb 2014. It’s a little embarrassing that it’s been almost a year and it’s still not done. But we’re on the home stretch! It’s actually just one task away from being completely finished but I’ve been pretty neglectful in keeping you all updated. I know, you were holding your breath and putting life on hold just dying to know what’s happening with my kitchen. Well get ready because you’re about to see a pretty rad looking tile job.
If you’ve been following along you know that the cupboards and new lights are done and looking great. That was the easy part. Since then the sexy black granite Kraus sink and equally sexy black granite counter have been installed.
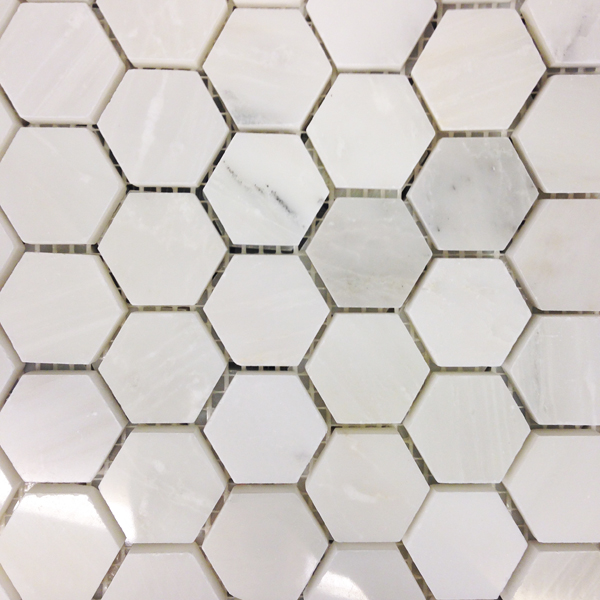
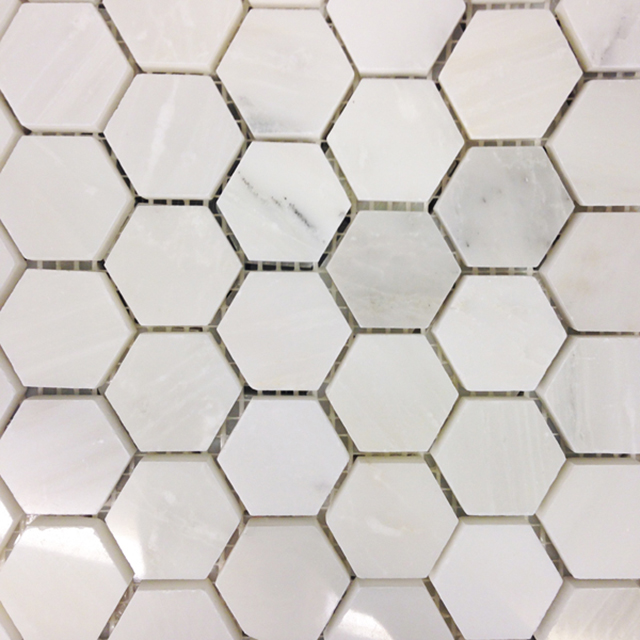
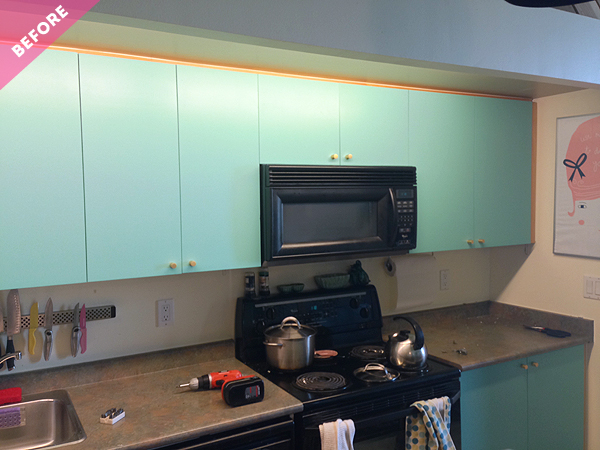
Then came the tiles! If you recall my kitchen never had any tiles or backsplash of any kind. I think it just makes a kitchen more complete with a backsplash.I went with these gorgeous honeycomb marble tiles from The Home Depot. With the new granite counter, I didn’t get those few inches of backsplash against the wall so the tile is really serving a function. Here’s the kitchen with the new cupboards but everything else original. You can also see the old, 90’s style laminate countertop which was replaced with dramatic solid black granite just before the tile went up.
You can see my sexy granite counter top. Doesn’t the black and teal just look so great together? Here’s the pretty much finished backsplash. The tile just gives the kitchen a way more luxe and finished look. I love the natural colour variations in the stone. If you’re looking for stark white, you may want to consider something other than marble because as you can see there’s quite a bit of grey.
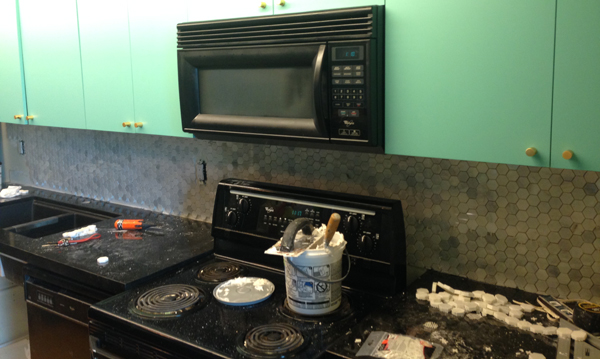 You could say that I love 50 shades of grey. I love it so much that I decided that, like cowbell, I needed more. I wanted to take the tiles all the way around the side walls and behind my new ‘faux’ open shelving (update coming soon). I decided I would tackle the additional tile myself. Call me cray cray. No seriously, it was sooooo much work! There’s definitely satisfaction in doing it yourself after the fact but the f-bombs were flying freely during the 4-5 days it took this amateur tiler. Have you ever used a wet saw? Oh, well I have. I have found that these wet saws are some of the best tile saws. Have you ever cut a million tiny marble tiles with a wet saw? Oh, well I have. Here’s one side half done – you’ll have to stay tuned for the final reveal to see the complete look but you get the idea.
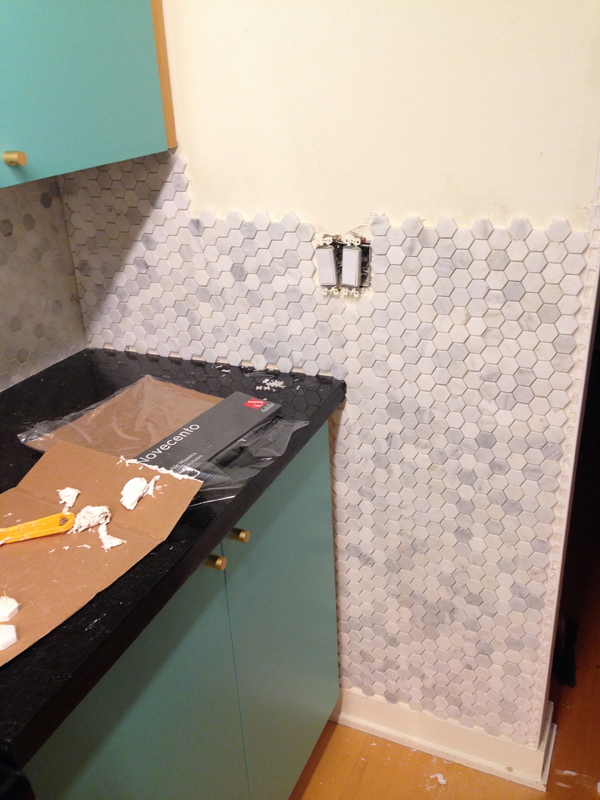 And this is the other side. As you can see, I also tiled behind what will be open shelving above the sink. Oh and catch a sneak peek of the granite sink while you’re at it. Call me cheap & lazy but I didn’t think it was necessary to tile behind the fridge.

I’m by no means an experienced reno DIY’er and there’s a bunch of great tile tutorials & tips out there in blog land but here’s a few tips that I can share from my experience:
• forget the hand cutters, buy or borrow a saw. Do your research though, as for some tile, such as marble, you will need a wet saw. They are really affordable and will pay for themselves in one project. If you catch a sale they can be as little as $40.
• I paid for the convenience of buying a pre-mixed grout. It’s more money but like I said, I’m not actually a great reno DIY’er so if I can eliminate any step that requires me to know what I’m doing, like mix grout, it’s worth it.
• marble is like the high maintenance diva of the tile world. It’s really delicate so not the easiest to cut and easily scratches. Make sure you buy the finest grout available to minimize scratching during application and be sure to seal the tiles before you grout because the tiles WILL pick up any colour from the grout.
• be sure to wipe the excess grout really well before it dries. Many instructions tell you to give the tiles one rough wipe then go back and wipe a few times later but I found that the grout residue just got stuck on the tiles and I had to go over and clean each one individually which sucked big time. Thankfully I realized this before doing all of it.
• Lastly, using a palm buffer or buffing attachment for your drill, give the finished tile a buff and it should eliminate any minor scratches and give it a great shine.
So what do you think? Was I crazy to tile the walls? Wait, don’t tell me if you think it was. I’m in love with the look so what I’m trying to say is that I don’t really care if you think I’m crazy. I’m going to leave you hanging a bit and you’ll have to wait to see the final polished finished tiles. Next up I tackle the ‘faux’ open shelving above the sink.
2 responses to “KITCHEN MAKEOVER: How to tile your kitchen”
I totally LOVE the tiles! Can’t wait to see it all when it’s finished!
Thanks Rachel. The tiles were like beauty & the beast. They sure are beautiful but they were a beast to put up.