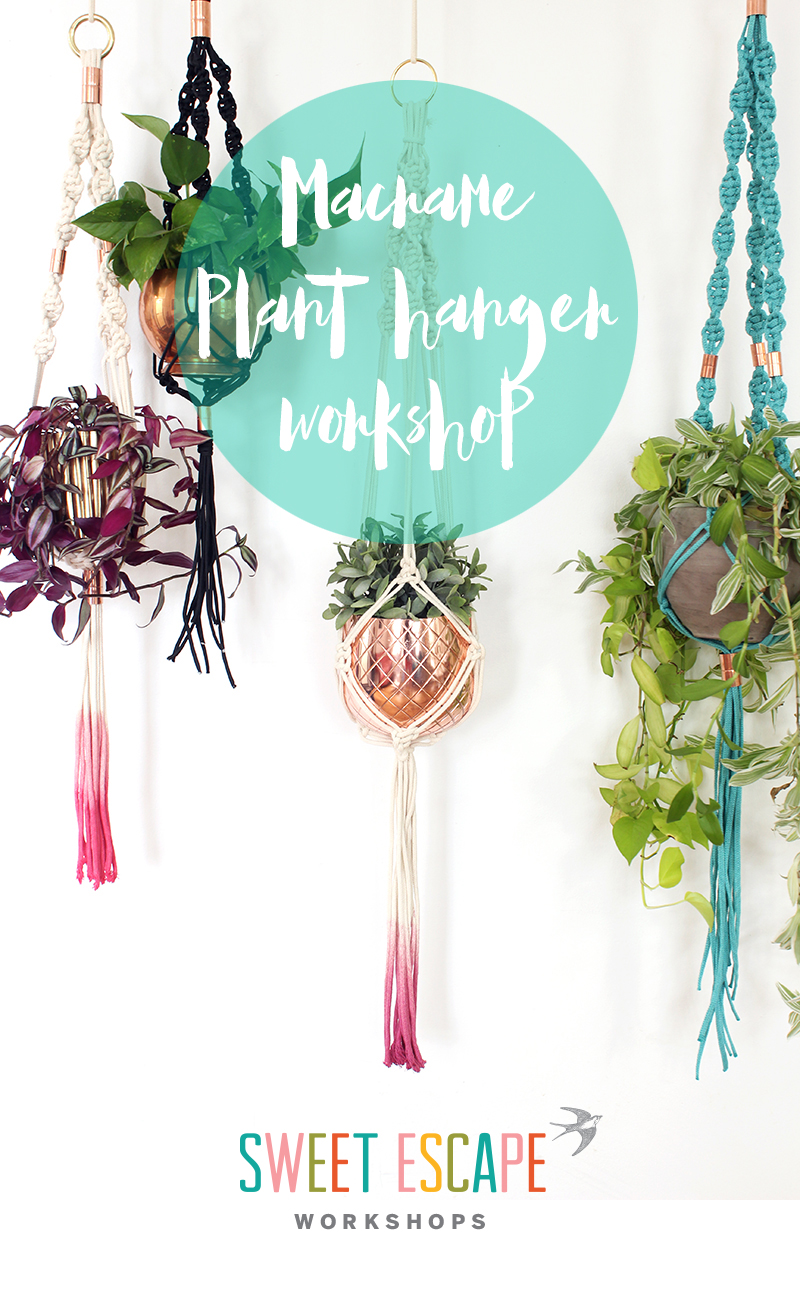
I know I keep saying it, but wow does time ever fly. It seemed like just last week I was excited to announce our DIY Macrame Plant Hanger Workshop and now it’s come and gone! I’m happy to say that it was a big success and have some great photos to share today.
First a big shout out to our partner, Home Depot Canada who provided all the materials. Workshops are fun but they take time, money and effort to run and this night wouldn’t have been possible without my friends at Home Depot Canada. Who knew you could make something so beautiful and bohemian from some everyday items at the hardware store?!
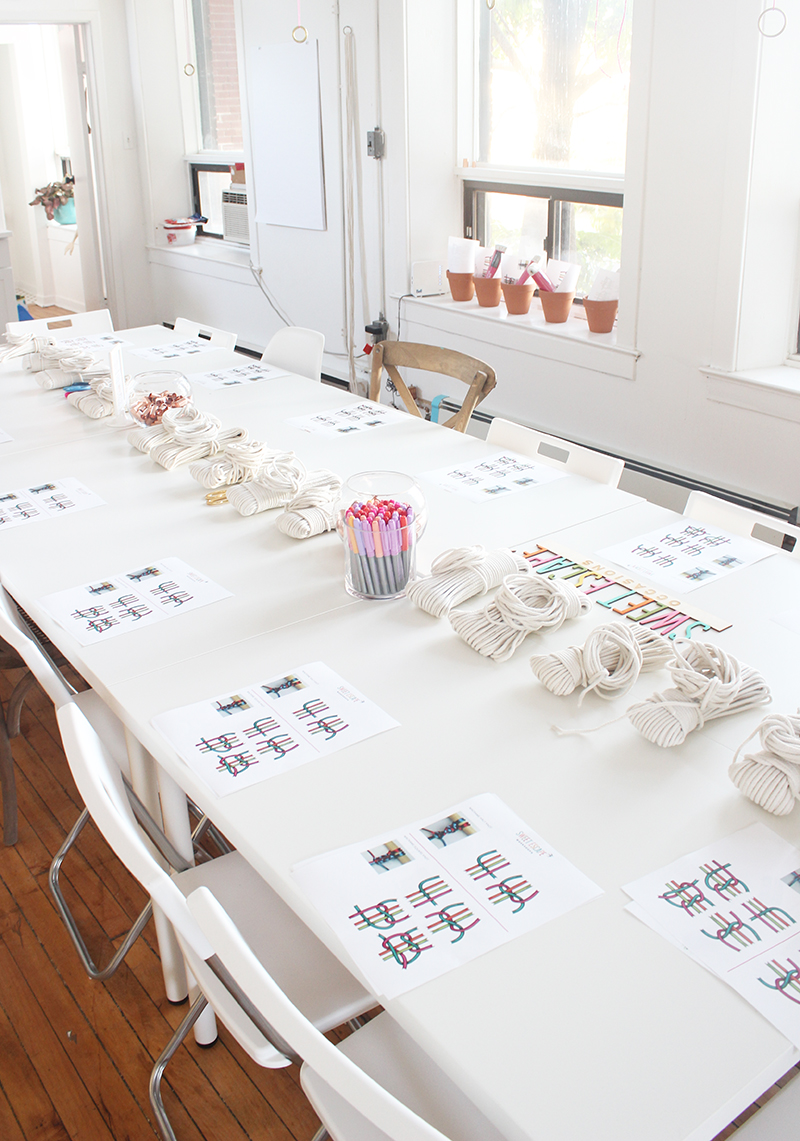
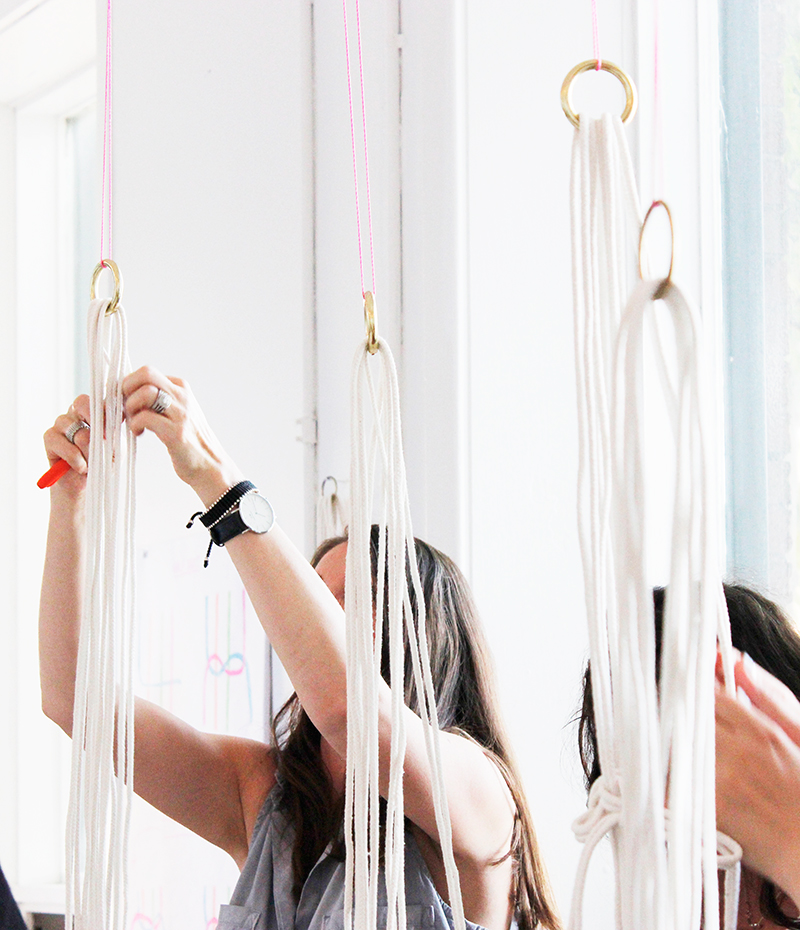
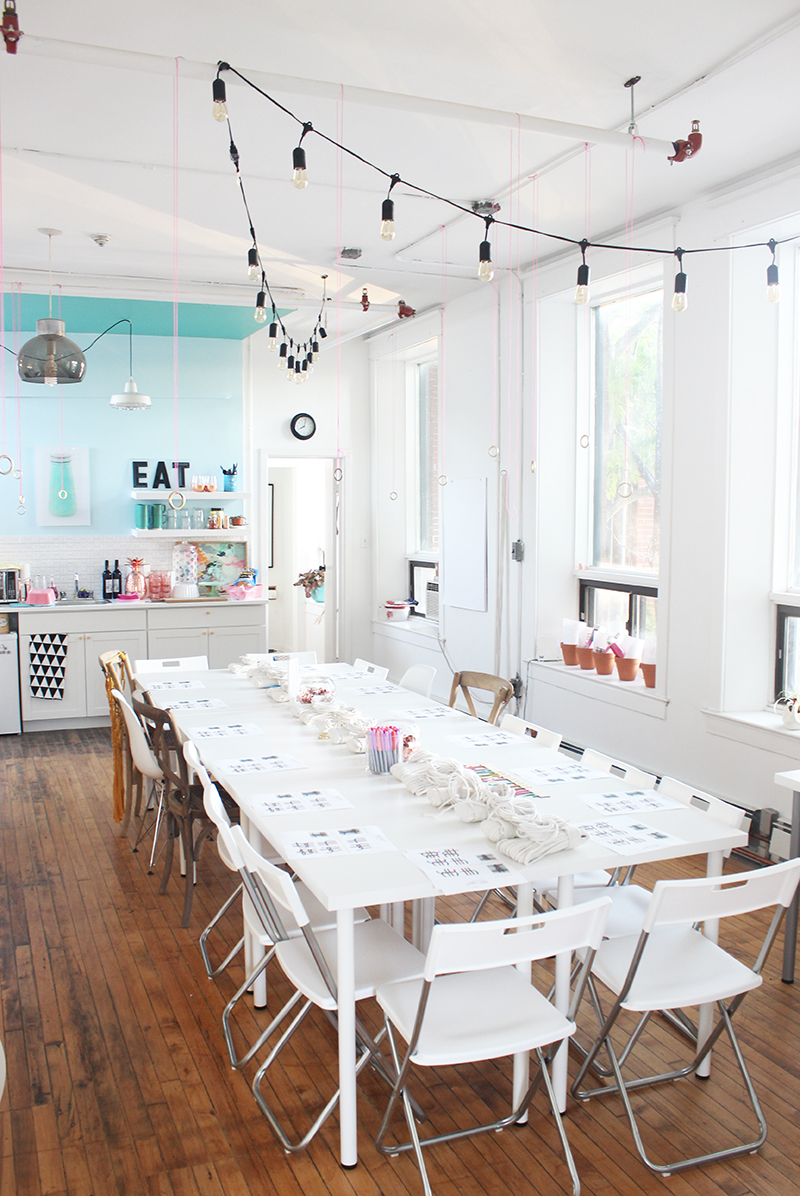 It was fun to get the studio in what I call “workshop mode”. Everything was laid out for each person and rings dangled from the ceiling to work from. Another shout out to high ceilings and exposed pipes – we couldn’t have done it without you. I just love all the windows and light in this space. It makes for such a bright and welcoming place to work.
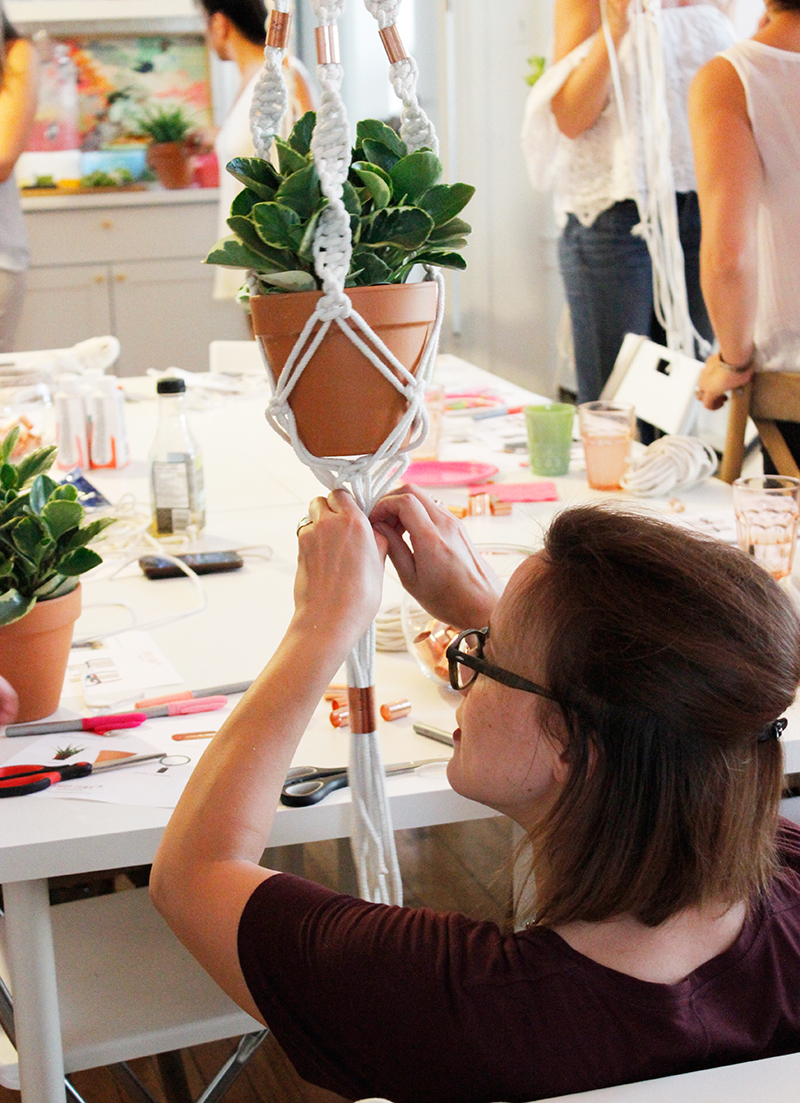
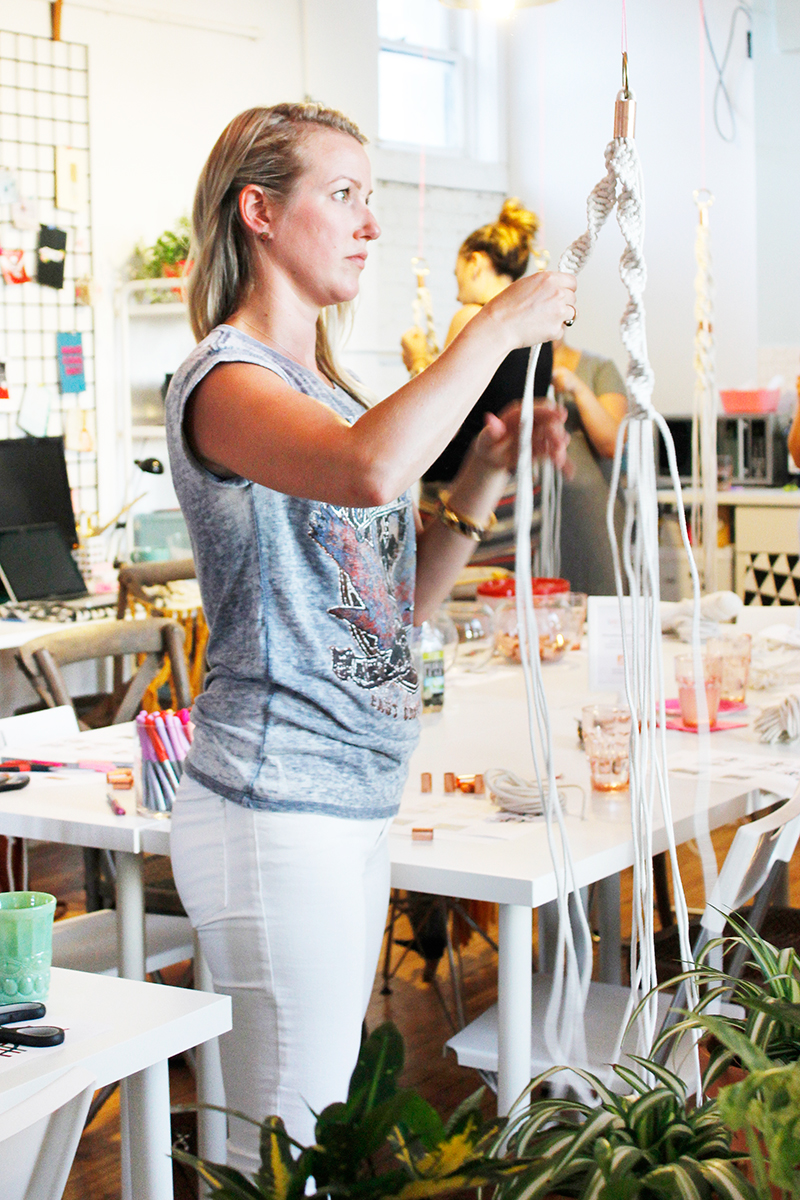
 After everyone arrived I gave a little demo and had 15 pretty confused faces looking back at me. Macrame is one of those things that looks harder than it is….well I think so anyway. If you were a friendship bracelet making machine when you were younger, you will get the hang of macrame in no time. Not to worry though – once everyone got through the tedious task of cutting their rope, ironed out a few hiccups and got started on their macrame plant hanger they really got into a grove. It’s one of those things that can be really relaxing and almost therapeutic as one person mentioned that night.

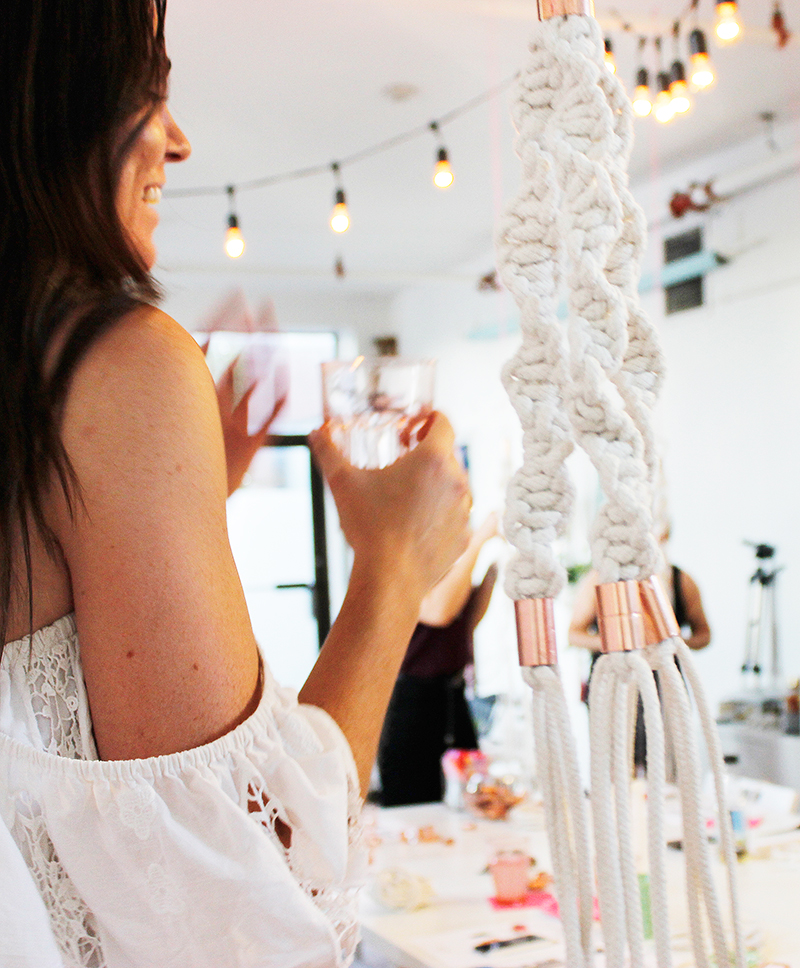
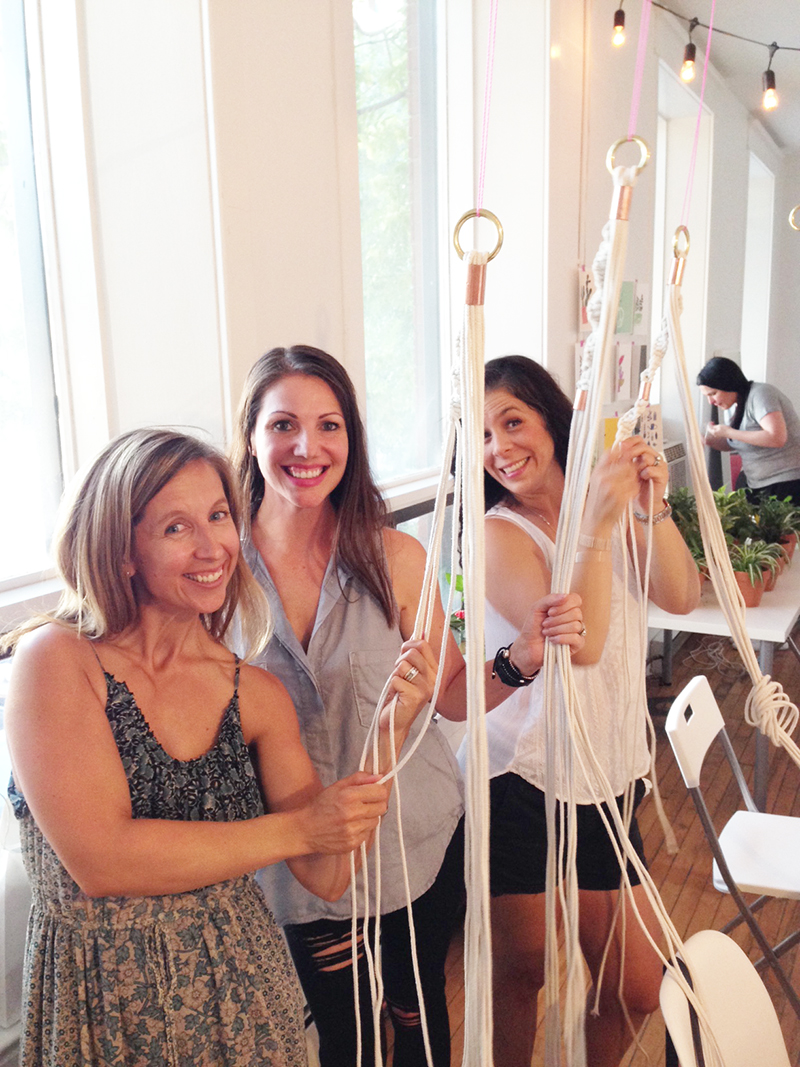
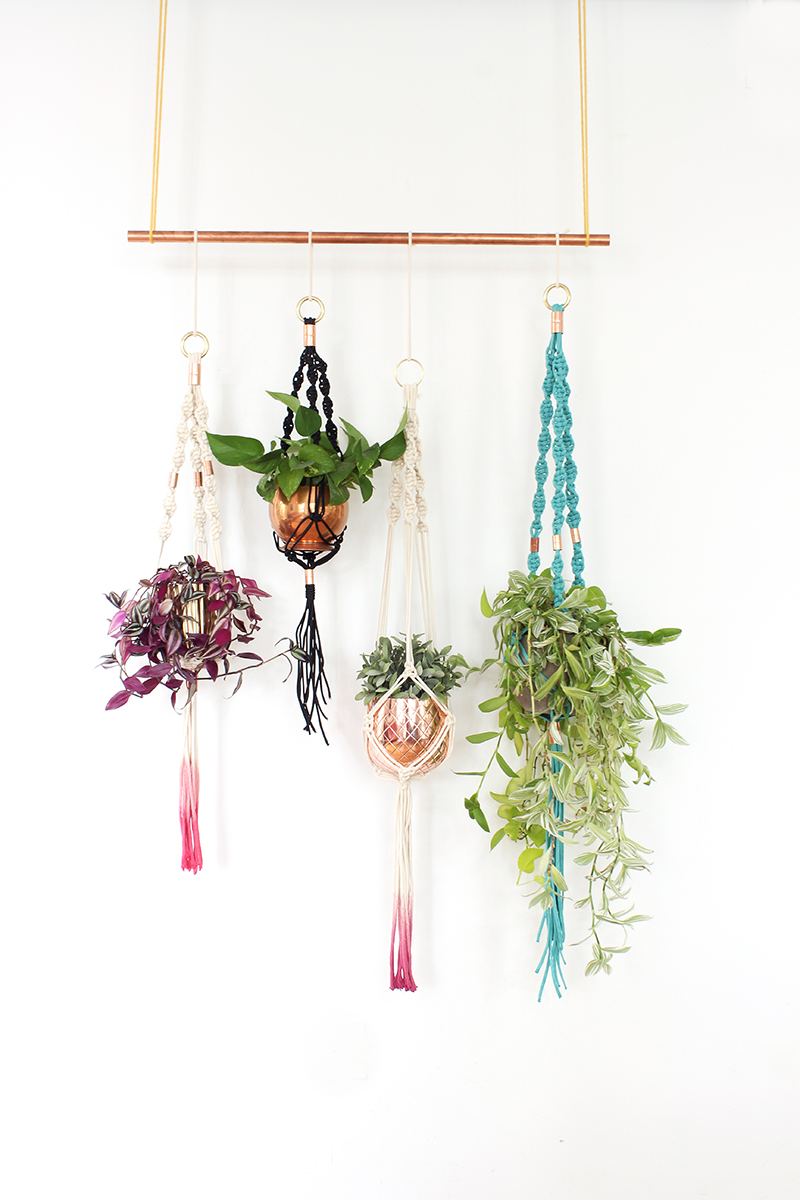
 In the end everyone left with their own fab boho chic looking planter. This group was not only talented and a blast to have in the studio but they were troopers for putting up with the heat that was no competition for 2 (!) air conditioners and 15 chatty and crafty ladies.
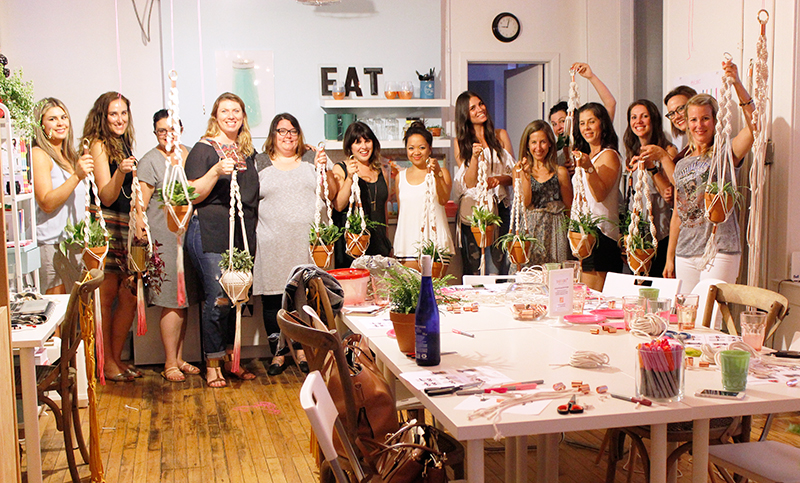 A special thanks to Autumn Hachey for her role as workshop paparazzi for the evening and doing a great job of capturing the fun we had and the macrame plant holders that were made.
Now if you’re wishing you were there or want to give it a try yourself, your dreams can come true. All you need is one trip to your local Home Depot Canada and you’re ready to go. Here’s your DIY macrame plant hanger shopping list:  DIY MACRAME PLANT HANGER SHOPPING LIST:
- Cotton 100′ clothesline
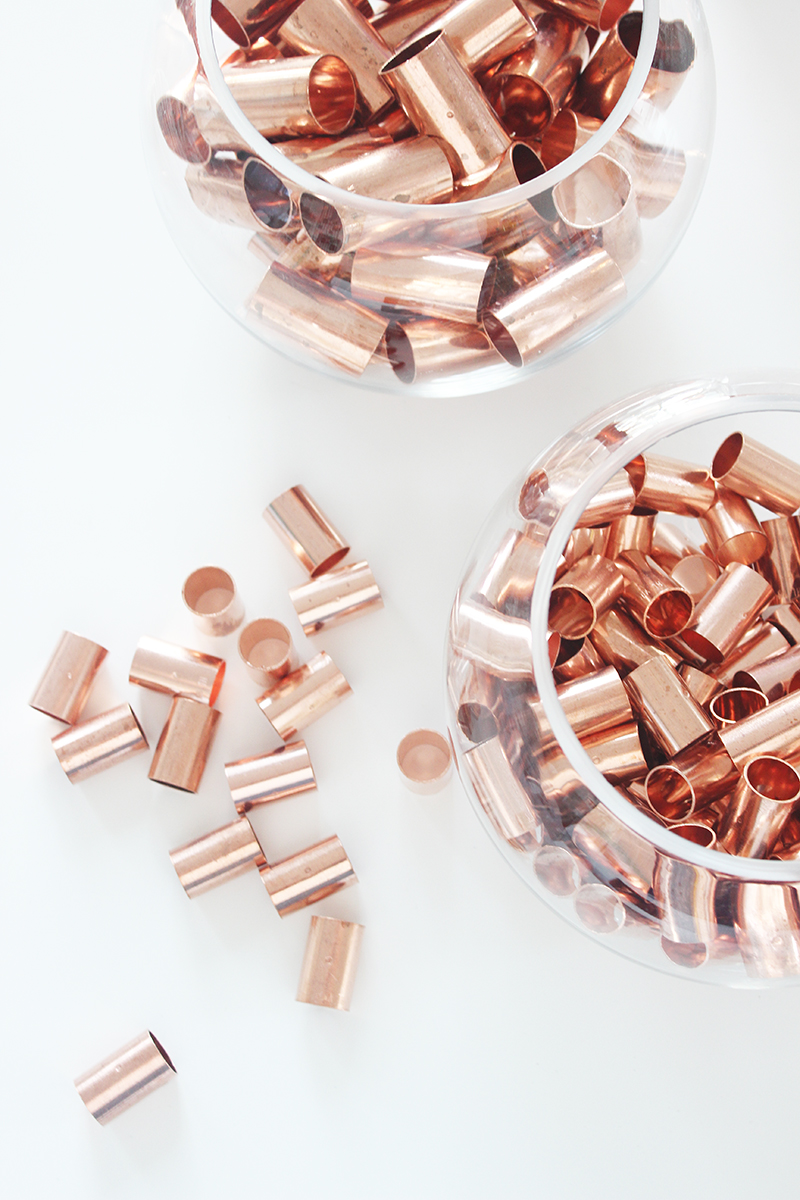
- Copper Coupling in 1/2″ and 1″
- Plant
- Drapery/Curtain Clip rings (remove clip portion)
- Terracotta flower pot (or similar)
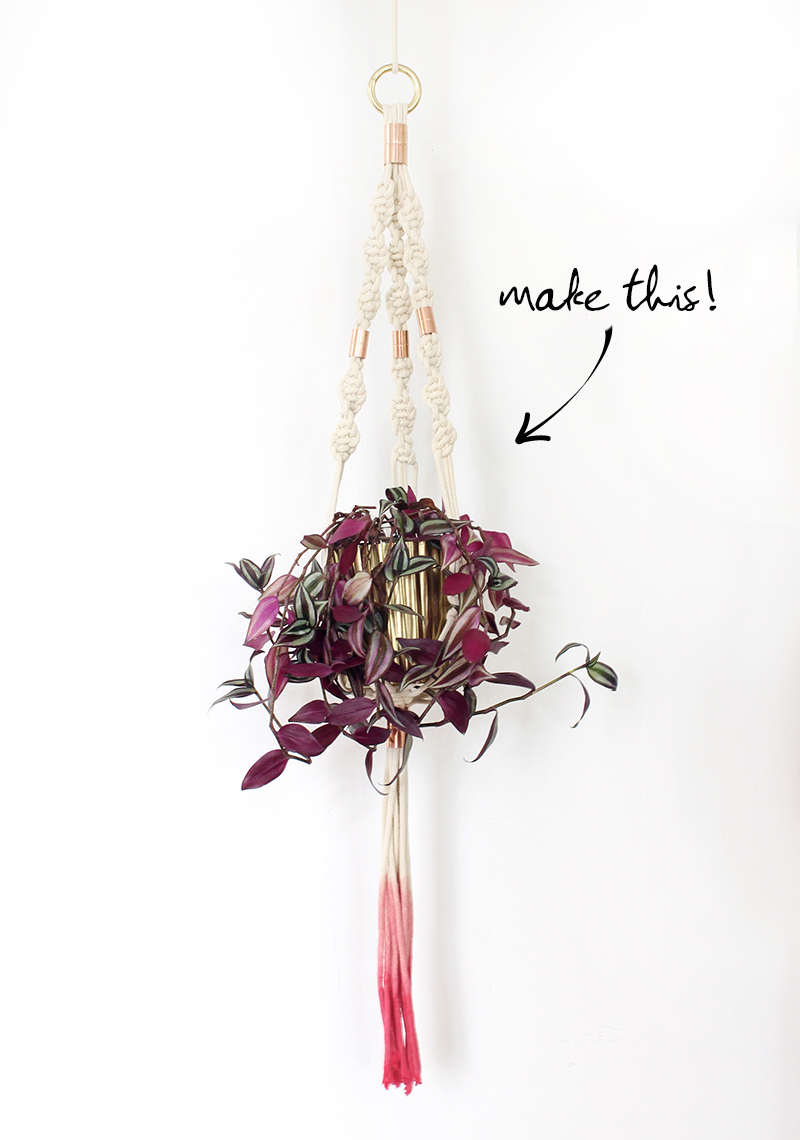
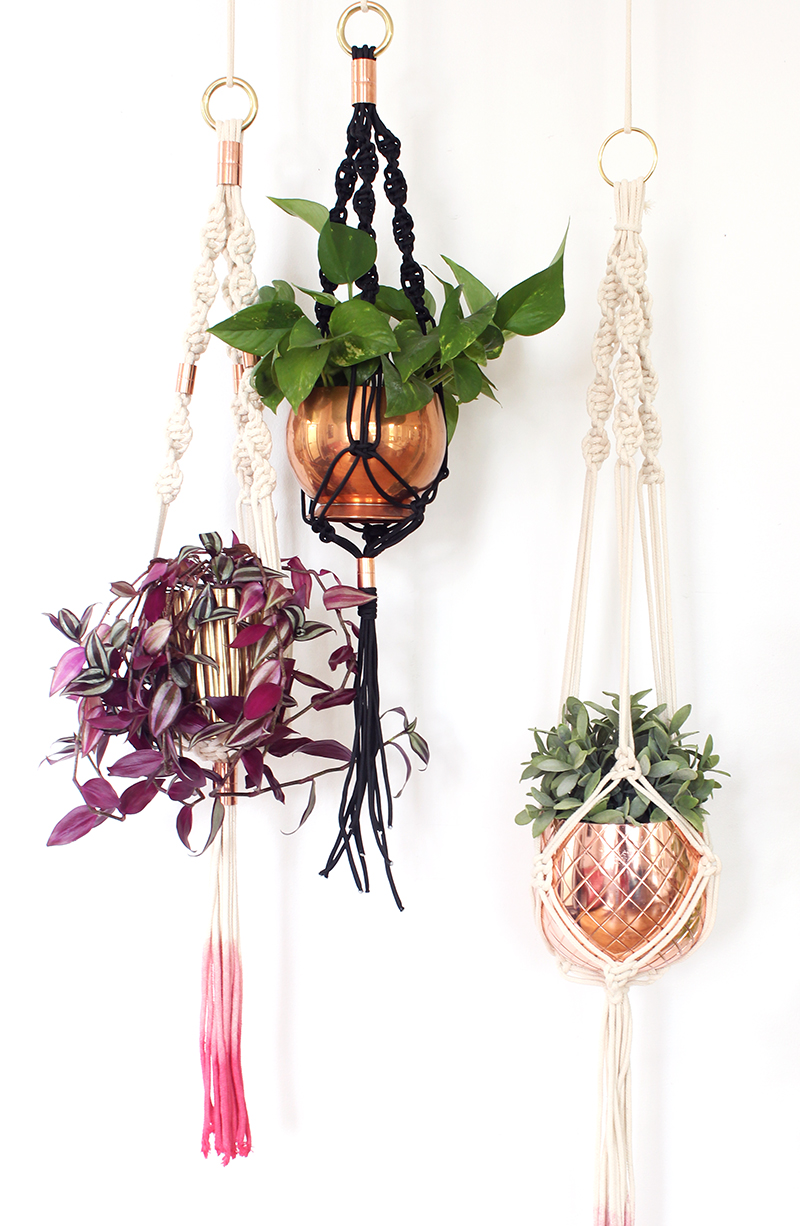
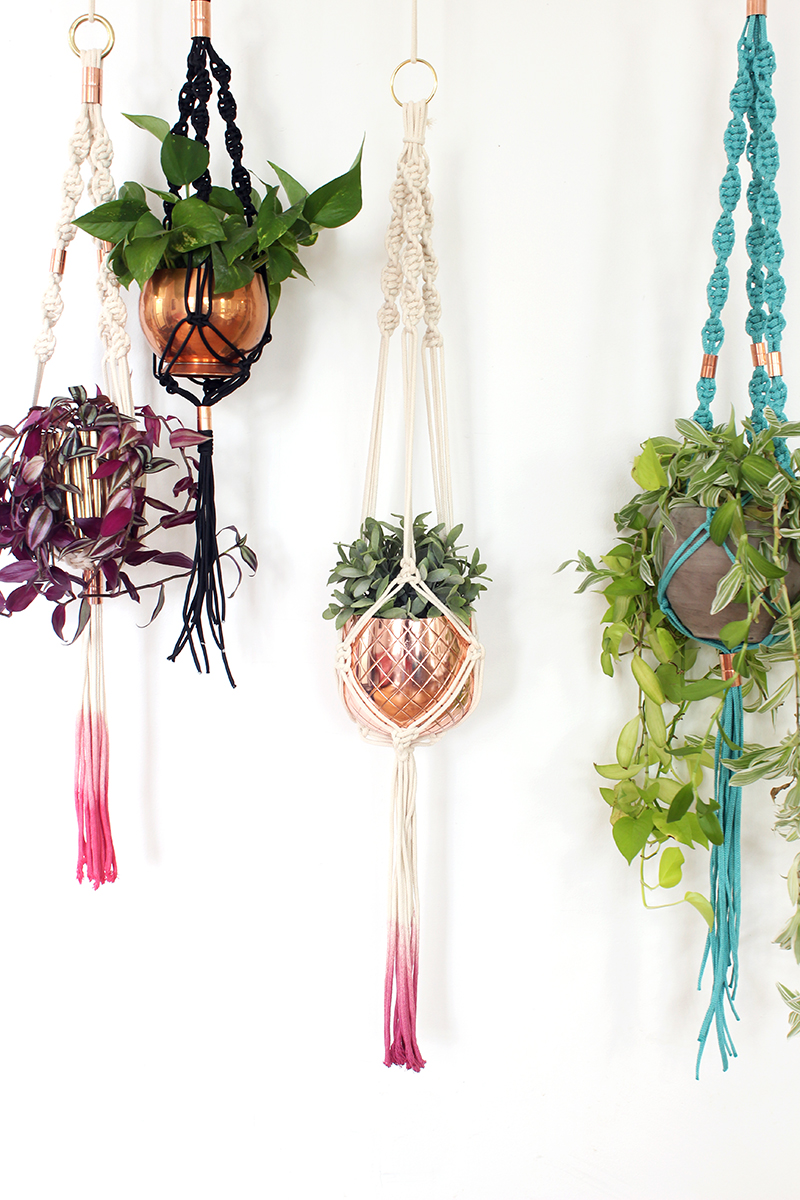
For the copper pieces, they’re for decor so it’s really up to you and your design on how many you want to use. For the planters we made, most people use 1 large piece each for the top and the bottom and 3 for decor on the sides but it’s totally up to you!
Cut your 100′ rope into 6 equal pieces. When you loop them through your top loop you’ll end up with 12 pieces (3 groups of 4) to work with for the knot shown below.
Believe it or not the planters we made only use one (!) knot. It’s called the half knot and it’s super easy. That fancy looking twirling part? Yeah, it just does it all on it’s own, how awesome is that?
 Here’s a simple illustration to help you out. If you’re feeling really ambitious and want to throw in a a square knot as well, guess what?! A half knot is half way to a square knot! crazy right? So check out the original illustration on Macrame Lovers to see the second step in the process to make a square knot.
 Then you’re all set to get your boho craft on! You’ll be hooked before you know it, I swear. Then you’ll end up with more plant hangers that you know what to do with. Pssst – they make for awesome gifts.
12 responses to “DIY Macrame Plant Hanger Workshop Fun”
These are so beautiful! Can’t believe I missed the workshop but I will give it a try myself since you share all the information needed! Thank you so much!
Looks like a fun event, Melissa! And your space – fabulous!
Thank you do much for this demo, will be at home Depot asap! By the way how do you get colored ends?
Hey Donna – sorry I forgot to mention, you just give the ends a quick dip in your fav fabric dye colour. Make you sure your rope is at least 50% cotton if you want to dye or else it won’t take. Good luck!
Love it, thank you for sharing! How long do you cut the pieces of rope and how many?
We used 100 feet and divided it equally by 6. Then when you hang them through your loop at the top you’ll have 12 pieces to work with (3 groups of 4) Check out the link I provided for a proper tutorial if you need some help.
I can’t seem to find the link to the tutorial.
Hi Jennifer. There isn’t a link to a tutorial. I give the basic instructions under the list of materials along with the knot diagram – which is all you really need. The post is primarily about sharing the workshop event, not a step by step DIY tutorial post. Sorry if that’s disappointing. Perhaps next time I report on a workshop I’ll include more detail for those not close enough to attend.
I can’t find the link to the tutorial? I want to do this with a sweet friend who has a birthday this week and wants to learn to make things like this. Thanks for the great post, and let me know if I missed the link somehow?!?
Hi Brandie, the post is primarily about sharing the workshop. The basic tutorial is written below the list of materials you’ll need. You create 3 groups of 4 pieces of rope and repeat the knot shown and it will form the twisted knot pattern.
Duh! Thank you!! Hoping ours turn out even as half as pretty as your workshop hangers!❤️
Found it informative and worthy,Will definitely give it a try
Many thanks