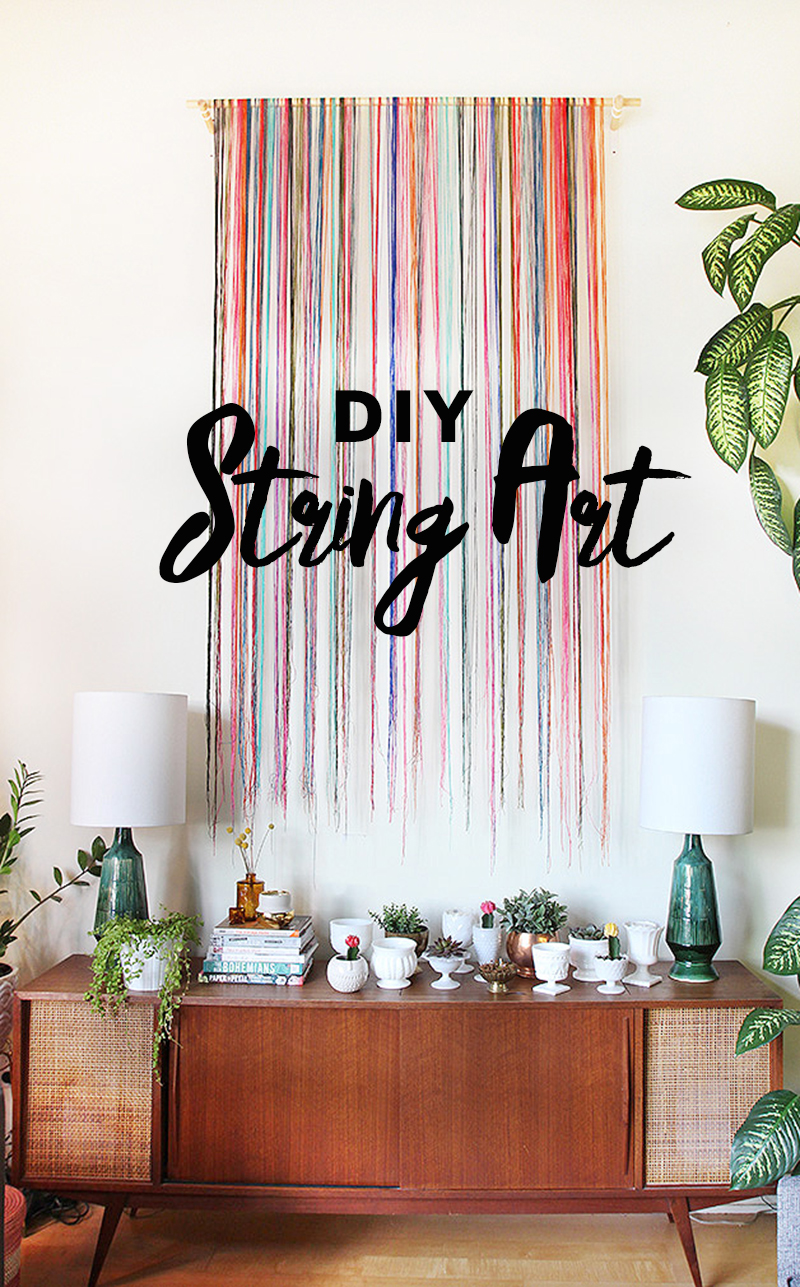
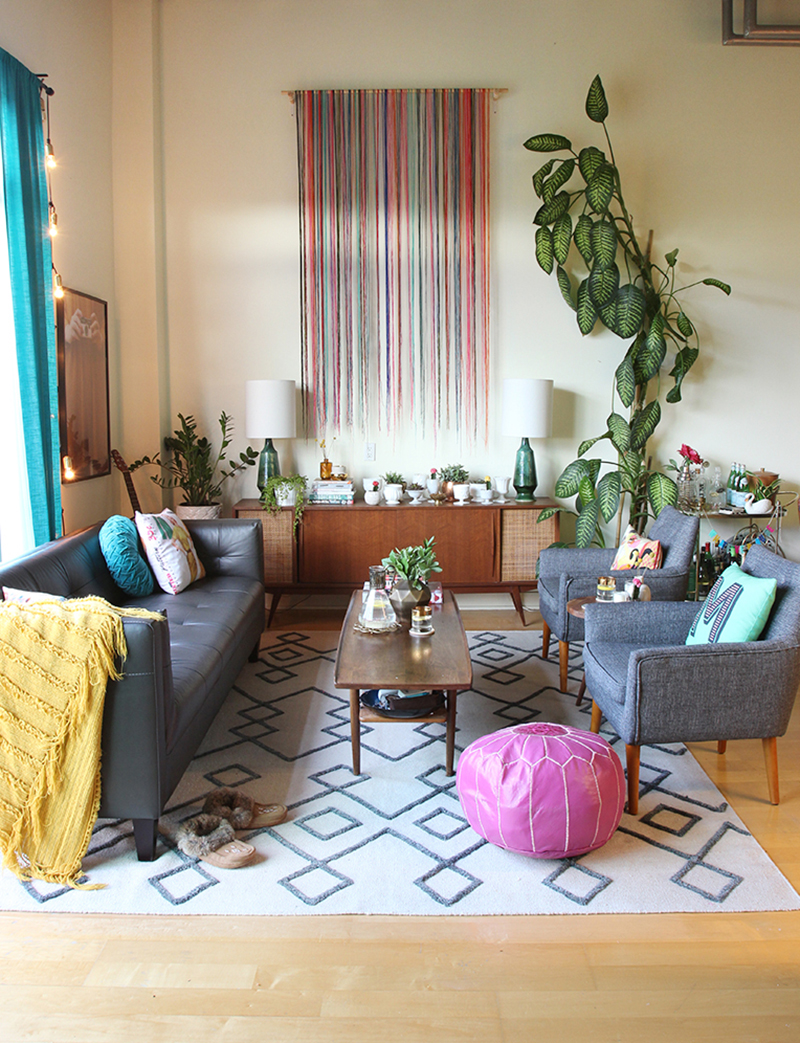
 So I’m not the best at following up but I eventually come through. It’s because once I’m done a project I’m on to the next! When I revealed my living room makeover ages ago I got a bunch of emails and comments about the DIY string wall art. I mentioned in the post that there really wasn’t much to it and wasn’t sure it deserved it’s own post but the people asked, so I’m delivering. I would like to apologize in advance for the quality of some of these photos but hopefully you get the idea.
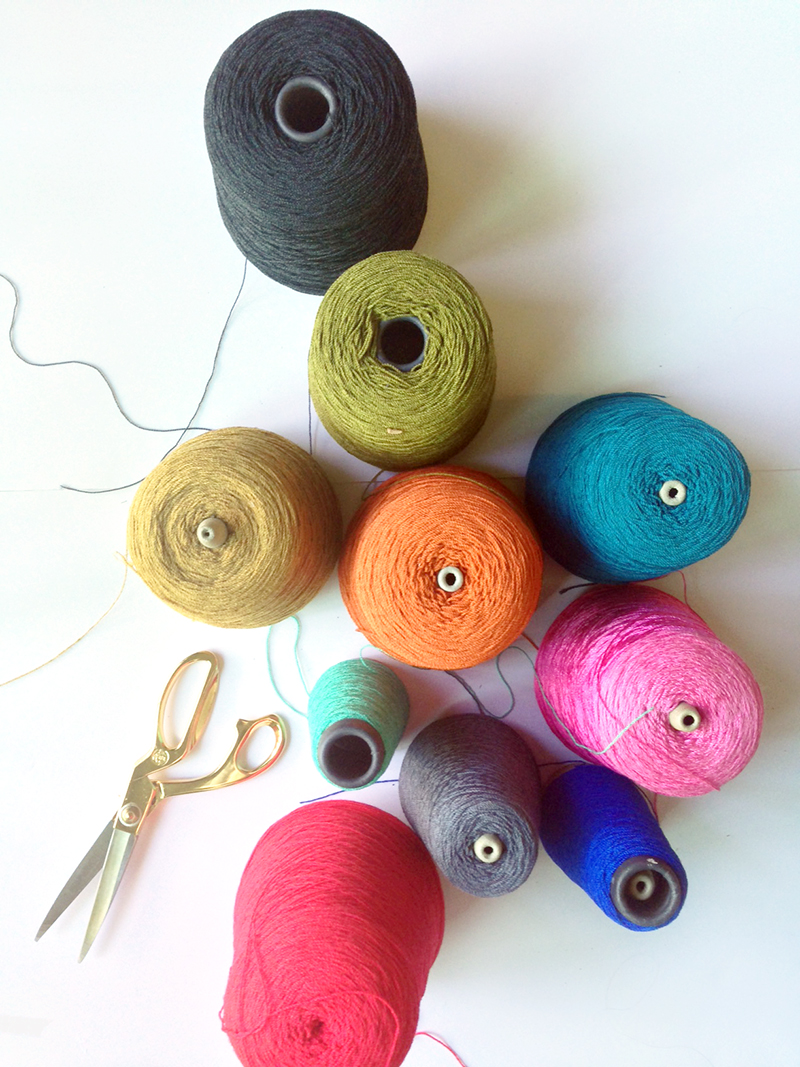
 If you’re familiar with Emily Henderson’s work you probably realize that this piece was heavily inspired by her living room (now dining room) string art. I was super lucky to come across this amazing thread via friend who knew someone who knew someone who used to own a clothing manufacturing company that shut down and was given this box full of thread in the most amazing colour palette. I know, that’s not helpful to you at all. If you want to attempt this try searching for spools of embroidery thread and then pick up one of these curtain rods from IKEA.
 Then it’s as simple as cutting the thread and placing it over the rod and you have yourself some DIY string wall art. It’s easier if you balance the rod between two chairs then hang it up once your finished placing the thread. Super easy! But not the most exciting I admit. I suggest setting up in front of your tv and just start mindlessly cutting and hanging while binge watching your favourite show.
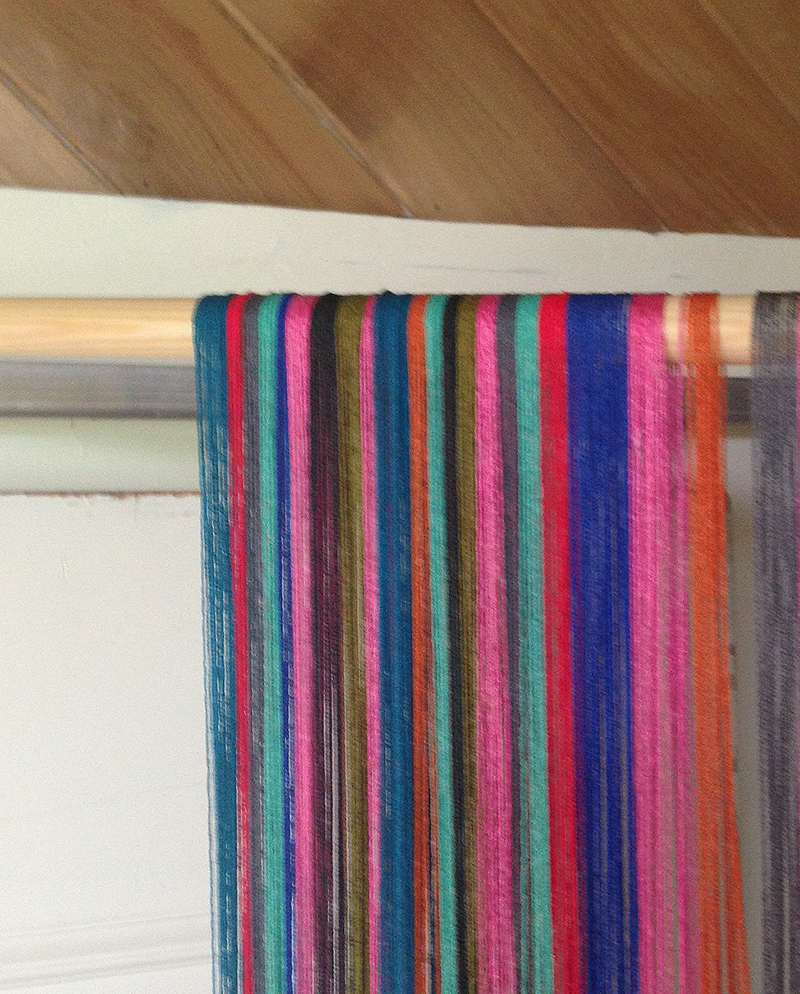
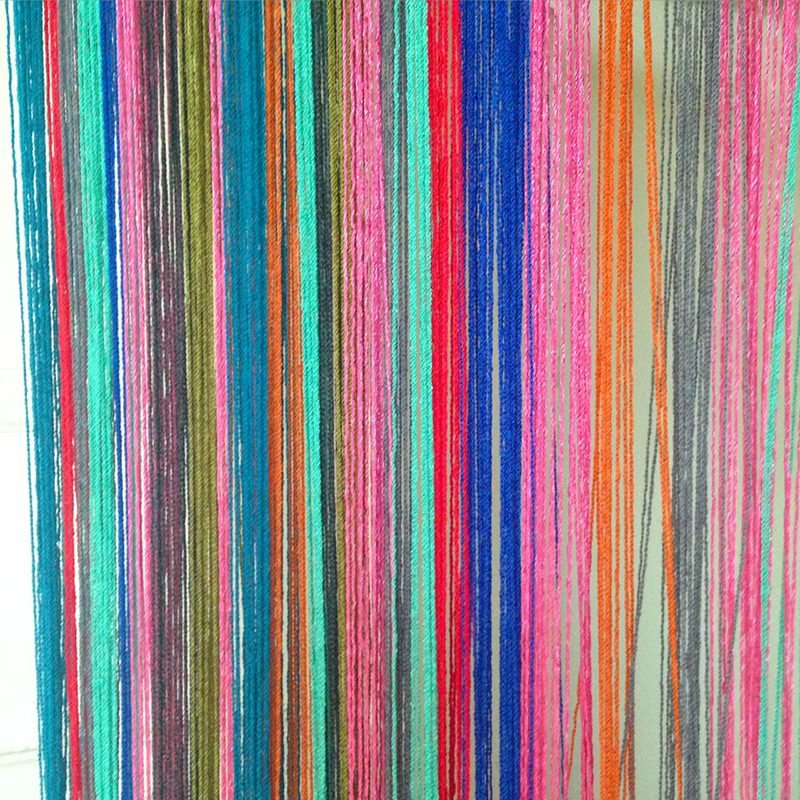 As you can imagine, the thread is quite thin so you have to string a large number of the same colour together to make a visible stripe in that colour or else it will just look a brown mess if you use a few of each colour. You could try this with yarn but you won’t have as light and airy of a look and the yarn may not hang quite as straight. But it would still make for a great piece! You can use a wide tooth comb or your fingers to “brush” your string if it gets a bit tangled up. If you rather have the string stay put then try putting a piece of double sided tape along the top before you get started, you’ll just have to be very purposeful about placing each string.

8 responses to “DIY String Wall Art”
This is gorgeous, and looks very similar to the one Emily has without the artist price tag. Side note, the friend who passed along the string is amazing!!!!
Thanks Rae! Ummm, yeah super awesome score!
What a great idea for hiding the required extra large TV over the mantle!!
How do you attach it on the rod? Do you tie it or do you go around the rod a couple times and leave it the length you want?
Hi Kelly, it’s not attached. You literally just hang it over the rod and let it dangle. Super easy!
How much is it?
I love this! I SOOOO want to try this! Questions – in the up-close pics, the thread looks thick, almost like yard. I am not super familiar with all types of embroidery thread, but I was thinking it was fairly fine/thin? Also, about how long did this project take you? Thanks!
Hi! I just used basic inexpensive yarn and it took me a few hours. I think embroidery thread may be a bit too thin to get the same effect.