You’re probably thinking, “what the heck is that girl doing in that studio she’s had for 4 months now?” That would be a very good question. The answer is taking my sweet @ss time pulling it together. Seriously though, I’m not being lazy I just keep getting interrupted to work, you know, to pay the rent. Ok and maybe just a little bit lazy. That and I’m flying 100% solo so things take time but this sunny weather is seriously motivating and I’m happy to announce that I’ve made some major progress.
Today I’ll be sharing the new and improved Sweet Escape Studio bathroom with you. Like I promised, I’m trying to be better about showing the progress and not perfection.
Now this is a working studio and a rental so obviously a total overhaul was not the plan. Thanks to my friends at Home Depot Canada I was able to make some smallish cosmetic changes with some paint, tiles and a few new fixtures to give this little space a big makeover. I know it’s a rental but seriously, I have to stare at it and use it for the next 2 years so it’s worth a little work up front don’t you think? I think you’ll agree when you see what it looked like before.
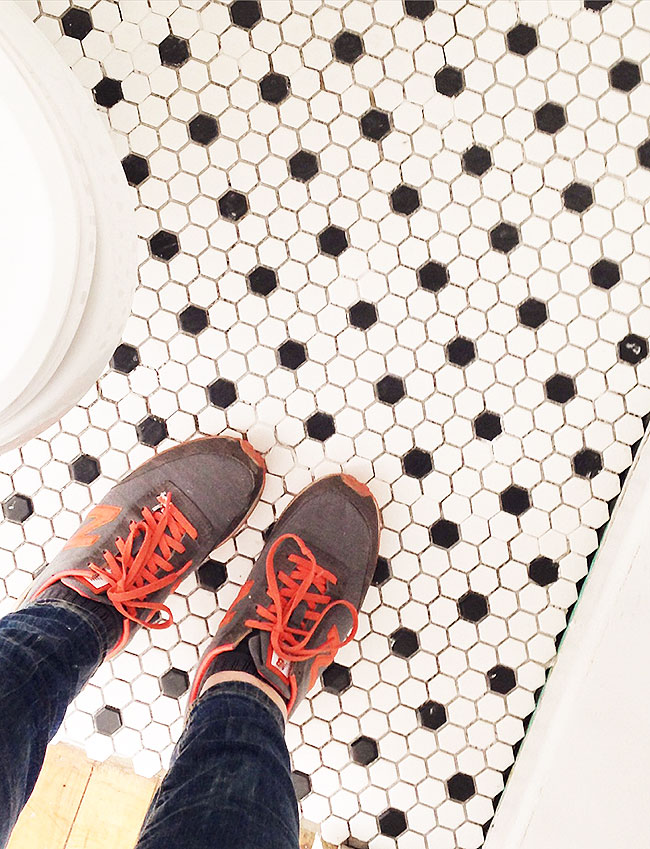
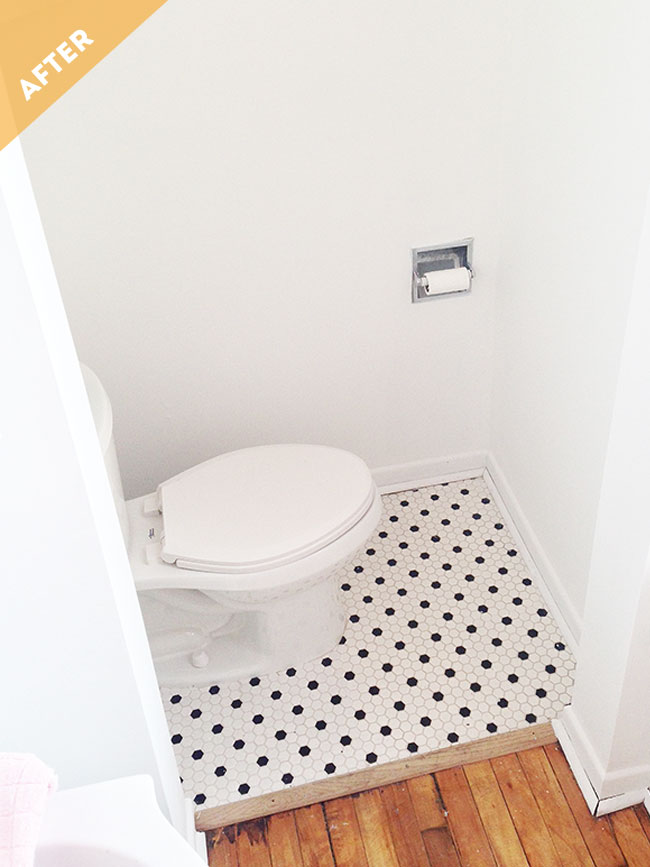
Let’s jump in with the floor. The studio has really great wood floors throughout including the bathroom with the exception of the small area around the toilet. It was hideous.
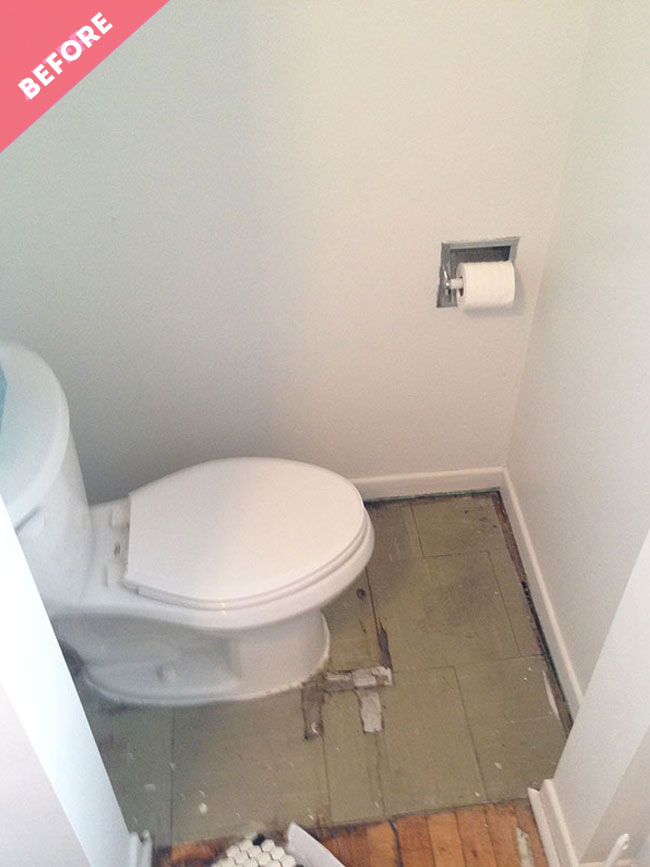
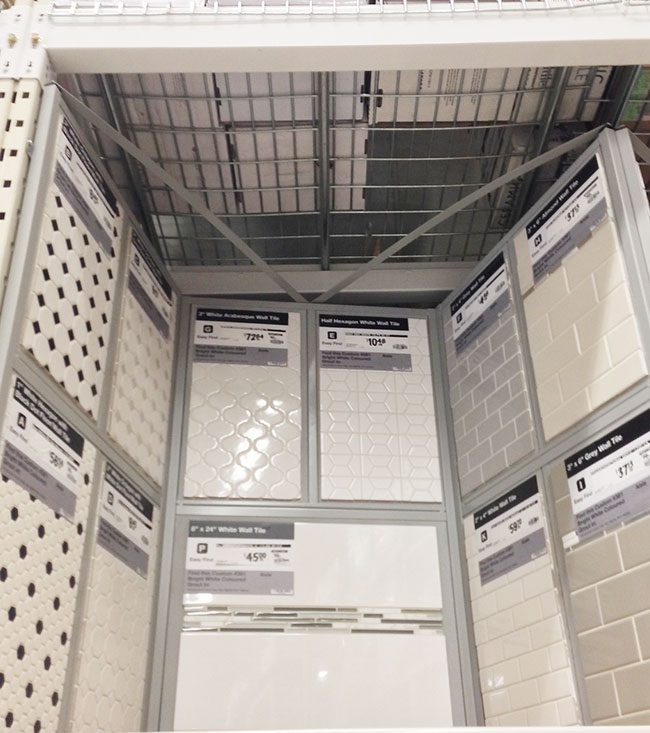
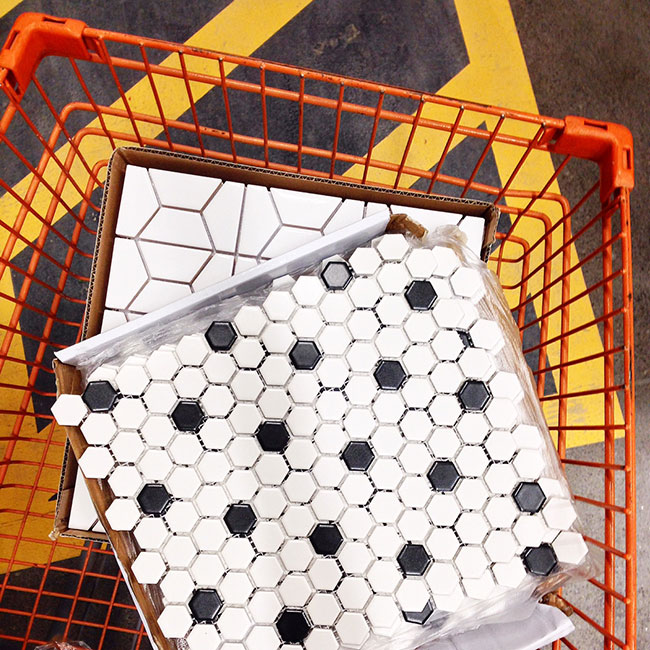
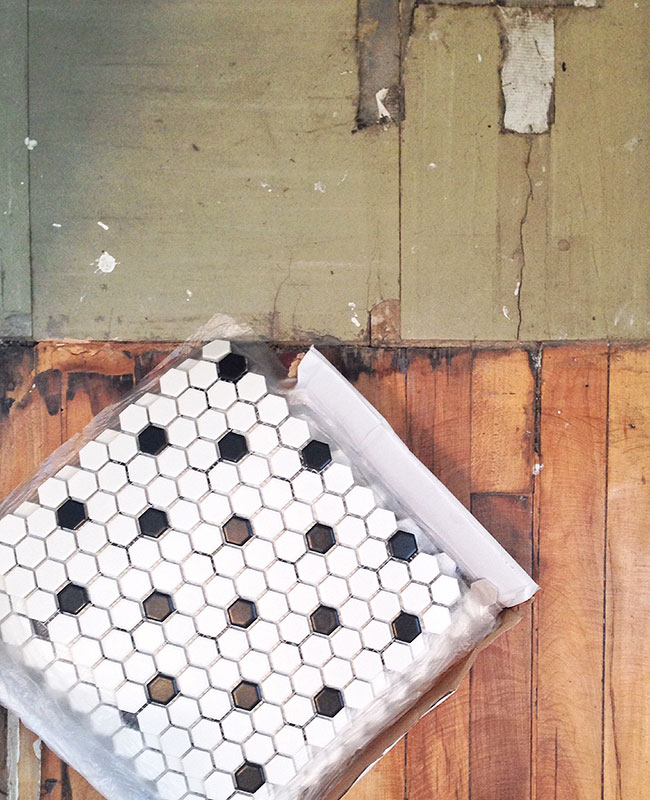
Gross right? My vision for the space is to go classic black & white with pops of pink so I headed to Home Depot to check out the tile selection and happy to find some great black & white options. I decided to with this timeless and super affordable black and white hex porcelain tile. (the other tiles below are for the kitchen which you’ll see soon!)
Now I did the tiling but I wouldn’t call myself an expert whatsoever. I would refer to some other more legit home reno DIY blogs on how to do tile. This was a pretty small space but working around the toilet was a bit tricky. I found a pair of tile nippers works best for these small tiles and tight spaces. You’ll also need some adhesive, grout and quarter round trim if you’re lazy like me and don’t want to deal with the edges. Note that I also chose the pre-mixed adhesive & grout – laziness has nothing to do with it, it’s more about sanity. Trust me, just pay more for the pre-mixed unless you really know what you’re doing.
The result? Not bad for an amateur! and it looks sooooooo much better. (The first photo is pre-grout)
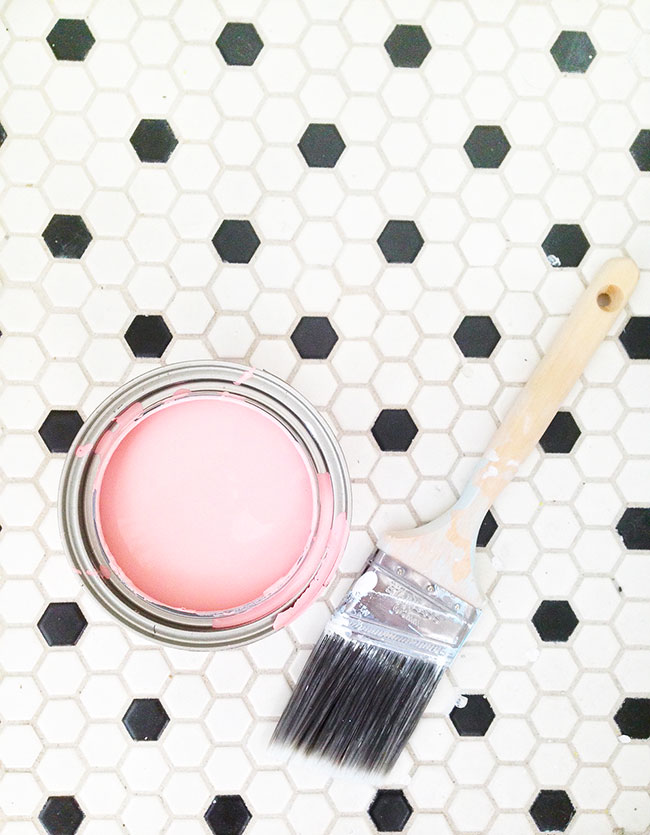
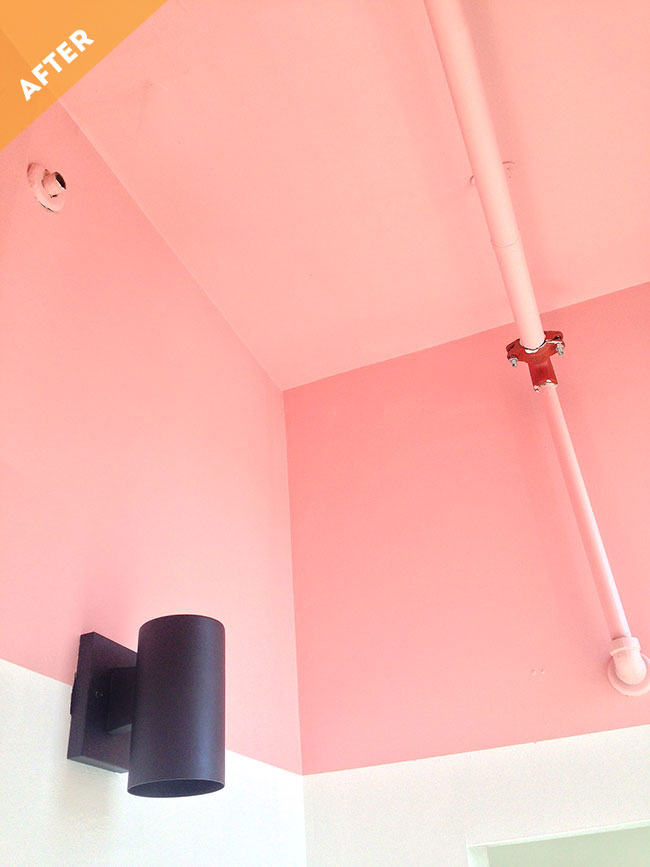
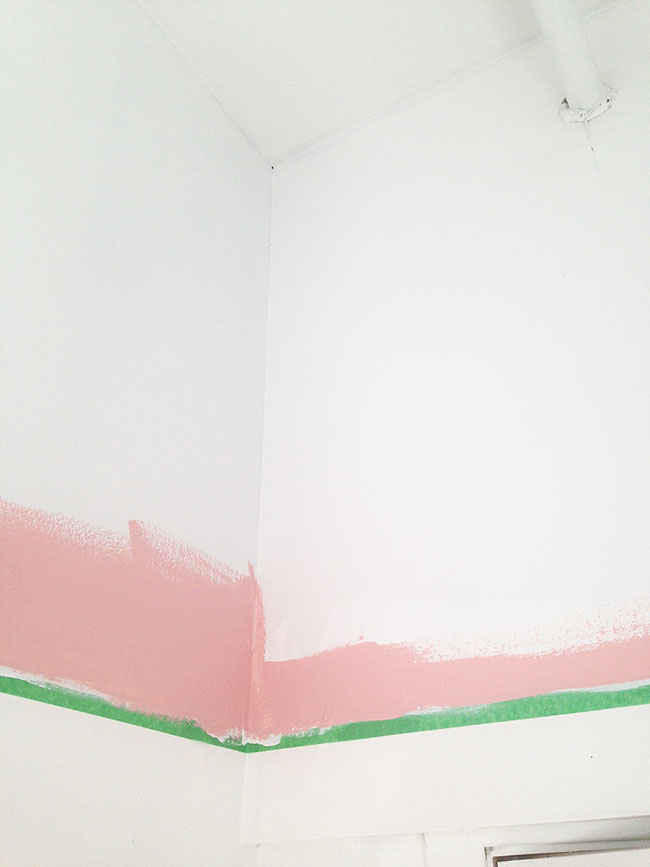
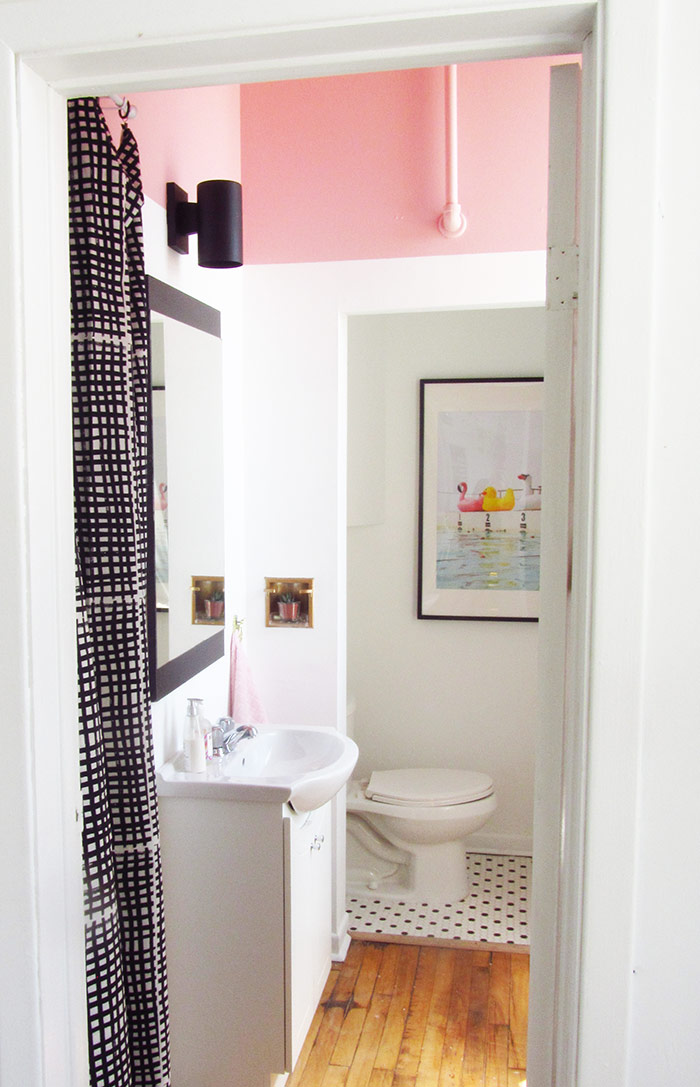
After the eyesore of the floor was taken care of it was time to look up, way up to the high ceilings. I’ve always wanted to do a colour block ceiling and this was the perfect opportunity. Because it’s a small space it’s also a great time to really play with colour. At first I wanted the bathroom to be just black and white but then I couldn’t resist adding some colour and what a timeless yet totally modern yet totally vintage and fabulous combo it would be to add pink. So I added pink, big time! I went with Behr’s Home Decorators Collection in Bridal Bouquet (HDC-CT-09). This may be the closest thing to a bridal bouquet I’ll ever have so I’m going to enjoy it.
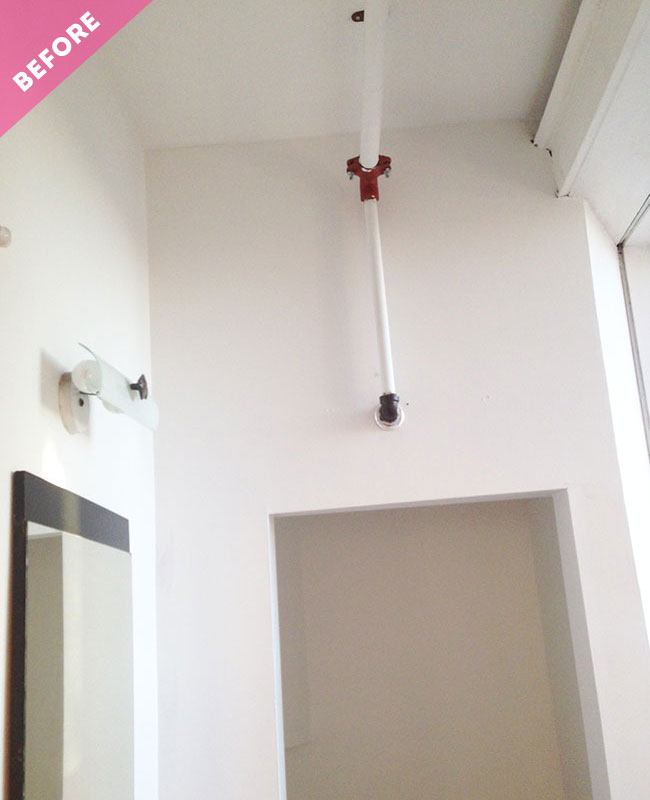
Here’s what the bathroom room looked like before. Just plain ol’white. Those high ceilings are screaming “colour block me!”.
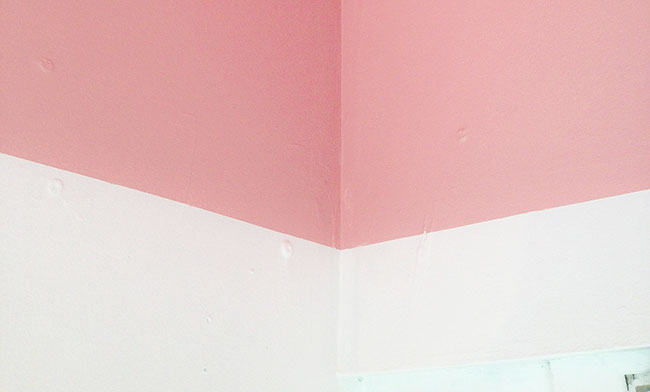
Ok, if you insist. Here’s how fabulous it looks now! No matter how much of an eye for colour I have or how many times I’ve painted something or the fact that I KNOW it will be different when it dries I still find it incredibly hard to choose a colour from a paint chip. I find that 99% of the time it comes out much more intense than I imagine. Good thing I like colour!
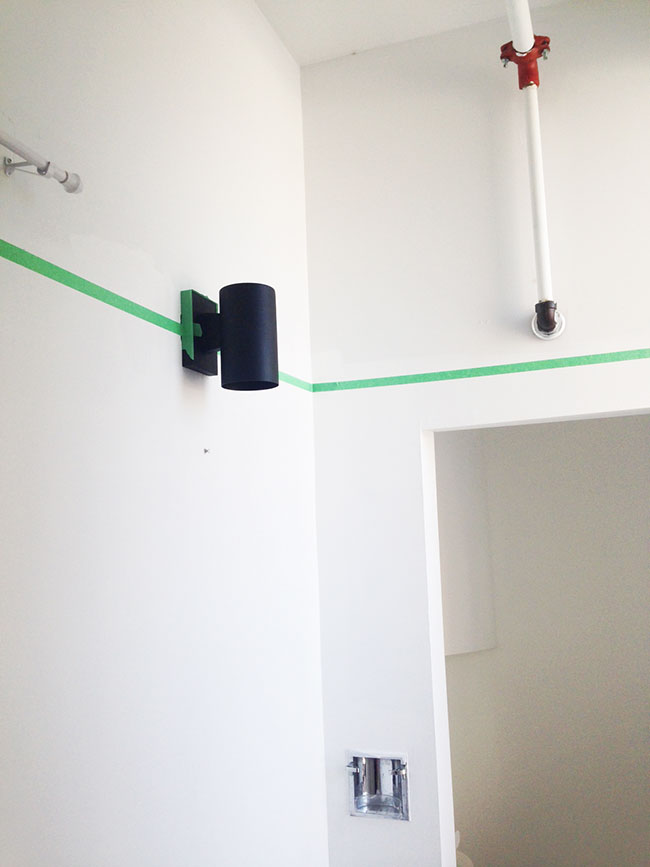
Now before I share with you the secret to those insanely crisp lines, let’s take a peek at the before & after light fixture and door handle.
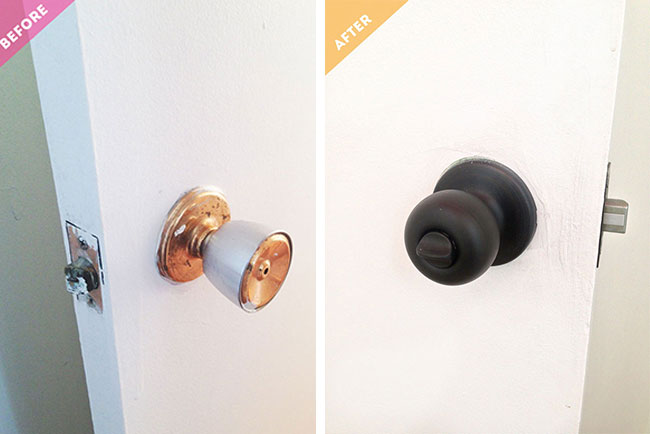
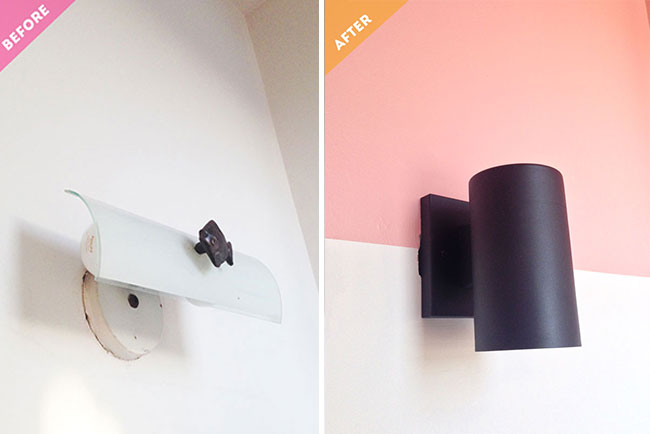
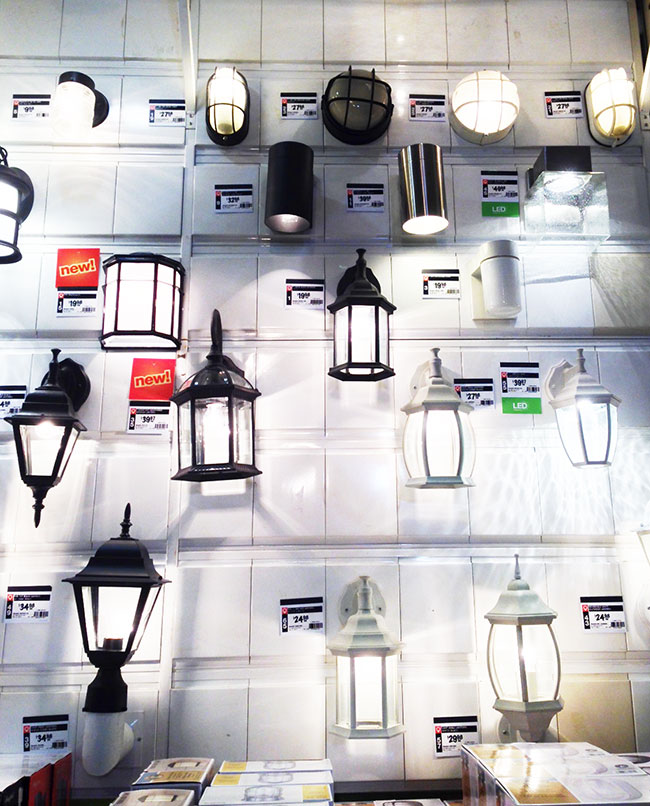
The black adds an instant modern update and looks amazing against both the pink and the white background. Here’s a tip – when looking for lighting, think a little outside the box. I found this great matte black fixture in the outdoor lighting section, which for the record is not near the indoor lighting section in store. As you can see Home Depot has some great options that can also work indoors if you’re looking for something really simple and not so traditional for a bathroom. Bonus, they’re really affordable too!
Ok, now here’s the part where I share my perfect crisp lines painting secret with you. It adds an extra step but it’s super simple and the results look so much better it’s well worth it. First paint off your colour block area using painters tape.
Then here’s the crucial part. Paint a coat of the bottom colour (in this case white) along the edge of the tape where you want the new colour. Allow to fully dry.
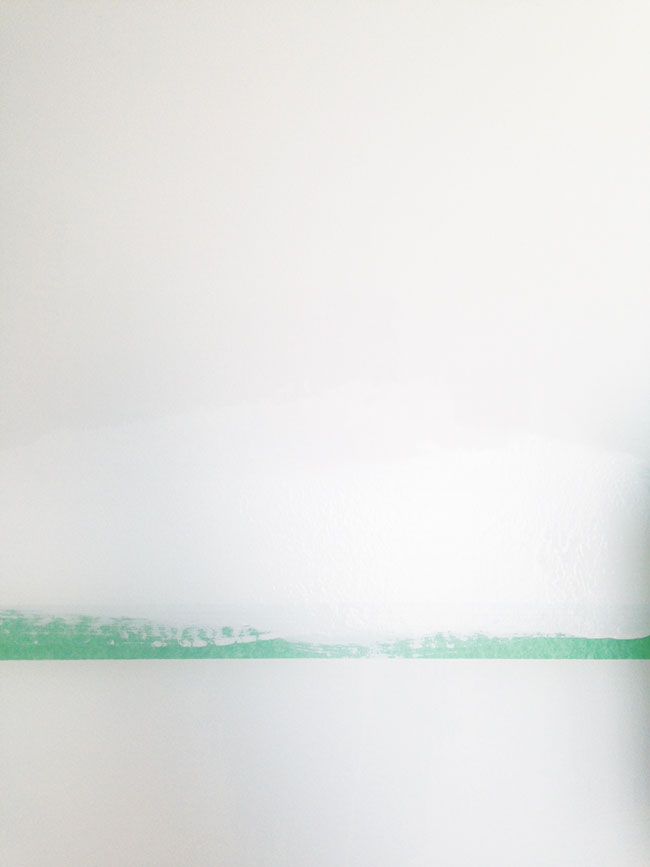
Once it’s dry, go ahead and cut and paint your colour block or stripe colour as per normal, right on top.
The coat of white paint not only acts as a seal once it’s dry but any bleeding that happens before it dries is the same colour as below so you don’t see it. Perfectly crisp. Every time. Guaranteed.
If you want to see the difference, here’s a spot where I forgot to paint white first and just counted on the tape. Blah!

So that’s the studio bathroom! It’s not perfect and it never will be because it’s a studio rental and there’s only so much time and money I’m willing to invest but it’s a million times better than it was. Now for a new mirror and some finishing touches and it will be complete!
Are you inspired to try colour blocking your ceiling? The good news is that it’s only 1/4 of the work and paint, the bad news is that you have to paint the ceiling. Arm workout anyone?
** UPDATE **
I just had to come back to this post to update those that are just coming across it now to show you the final look because quite frankly it’s just too damn adorable not to share. This is one of the simplest and low budget makeovers I’ve ever done and I think it may just be my favourite. I love this bathroom so much I wish it was my home bathroom and not just a studio rental.
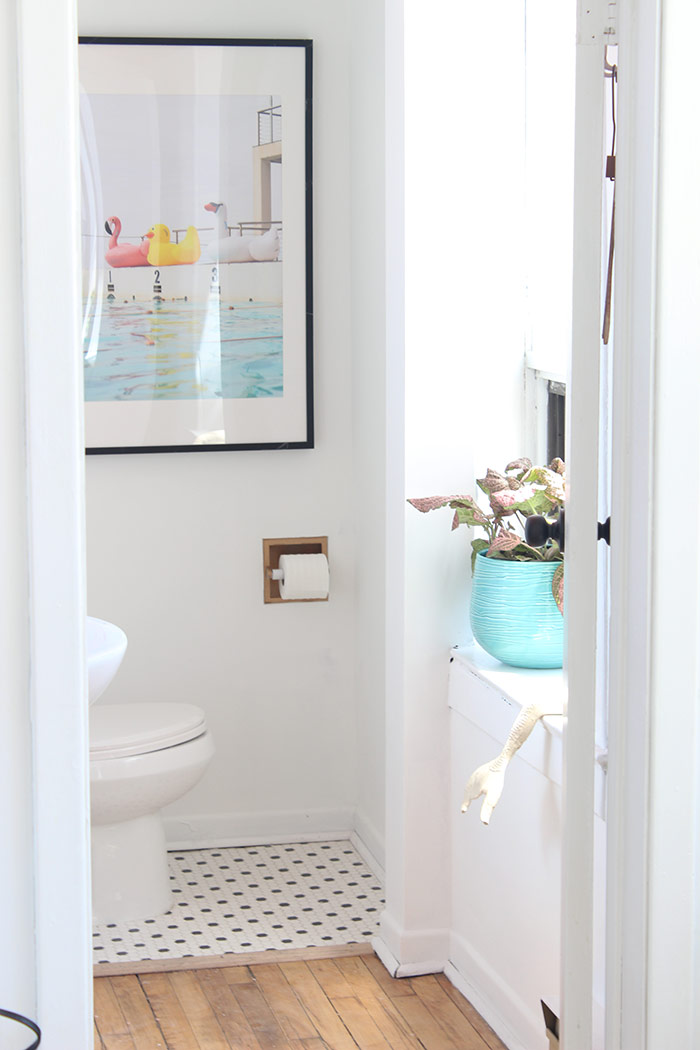
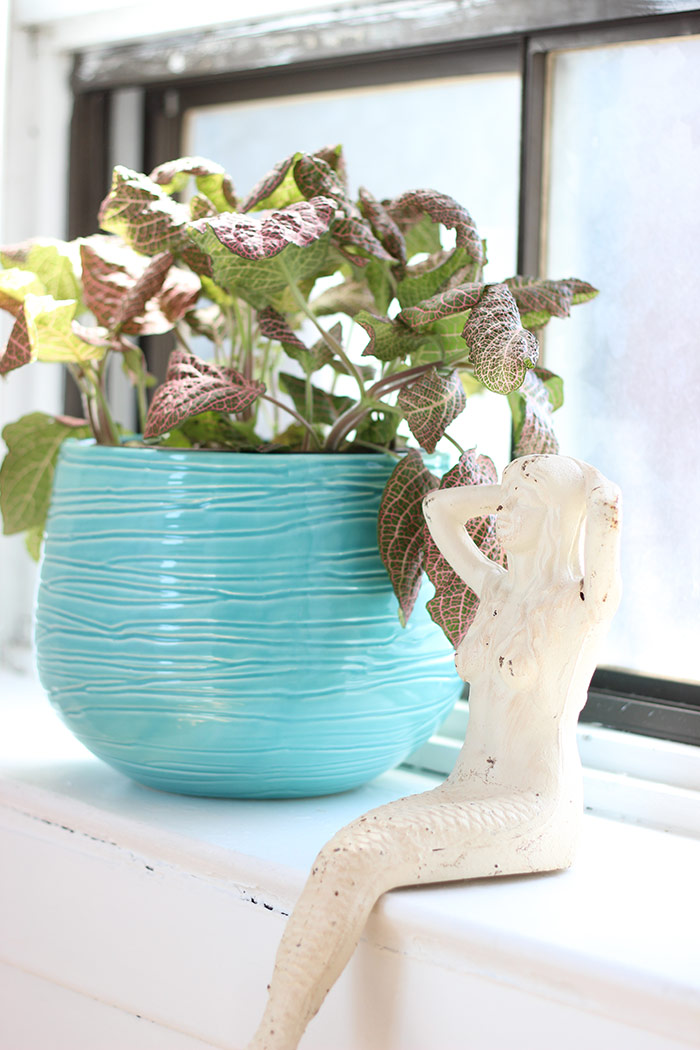
A few select accessories in a small space make a huge difference. If you’re digging this look, here’s how to you can get it at home. Sorry guys! the mermaid and art are one of a kind finds but here’s some similar picks:
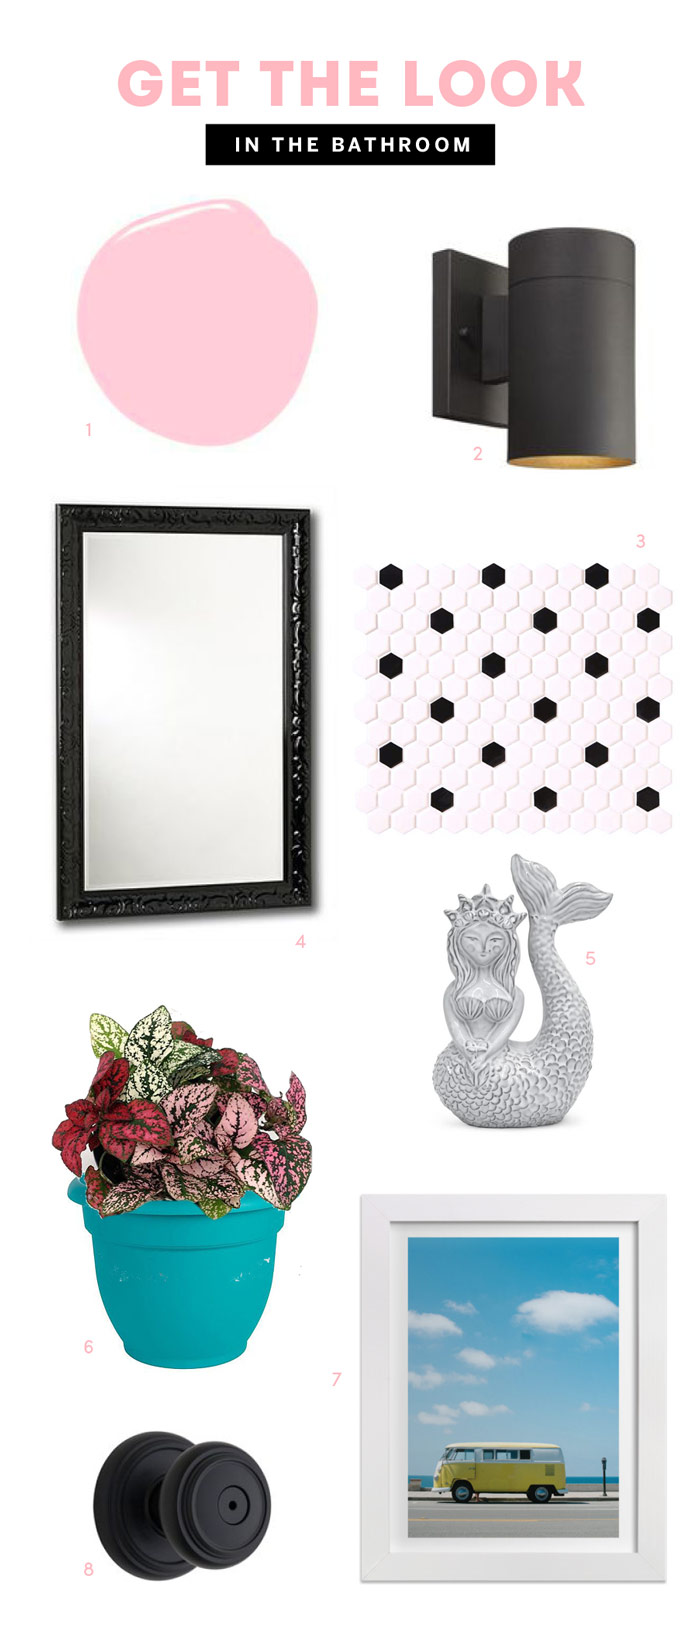 SHOP THE LOOK: 1. Bridal Bouquet by Behr / 2. Black Wall Light Fixture / 3. Black & White Check Porcelain Tile / 4. Black Frame Mirror / 5. Decorative Mermaid / 6. Teal Planter / 7. Summer Inspired Art / 8. Black Door Handle
Thanks again to Home Depot for helping me update and refresh my studio bathroom. Who wouldn’t want to look up at some pretty pink ceilings while they’re taking care of business?
6 responses to “Sweet Escape Studio Bathroom Update plus how to paint a perfectly crisp line”
Amazing transformation!!! Great work lady!!
Nicely done, Melissa! Show us more!!!
Gorgeous! I love the addition of pink and you’ve totally inspired me to try my hand at tiling my own bathroom floor!
Awesome! A small powder room is a great place to start :)
This bathroom is adorable. I especially love the art. Those giant pool floaties are perfect. Where is it from?
Hi Becky, thanks for the kind words! It’s just an image I grabbed off the internet – it’s not a proper print for sale.