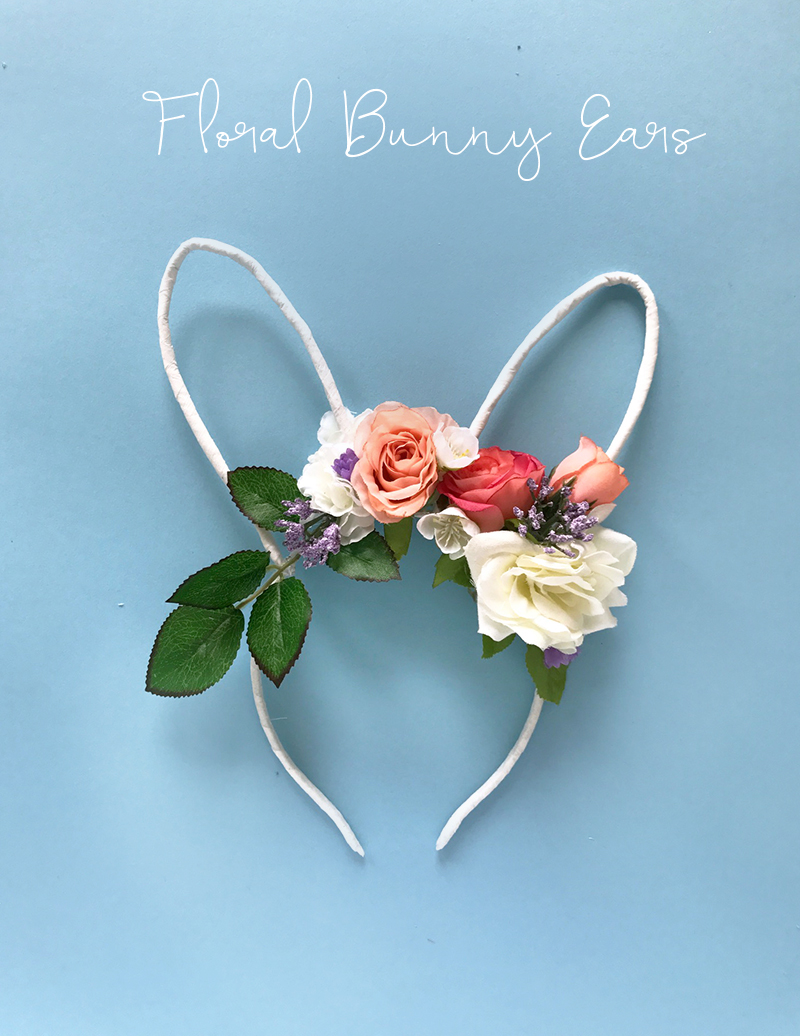
 Ok so I don’t have a kid and I usually don’t dress up like a rabbit for photos but I do have lots of friends with kids who like to dress up like rabbits. So when one of your bestie asks if you can work your craft magic to make a pretty set of floral bunny ears for her adorable daughter you blog about it. This is a perfect example of a project that looks super glam but it’s made with almost all items you can find at a dollar store or in your home.
 The only thing you may not be able to find at the dollar store is the floral tape but it depends on the store, you never know! Or else you can find it at Michaels for sure.
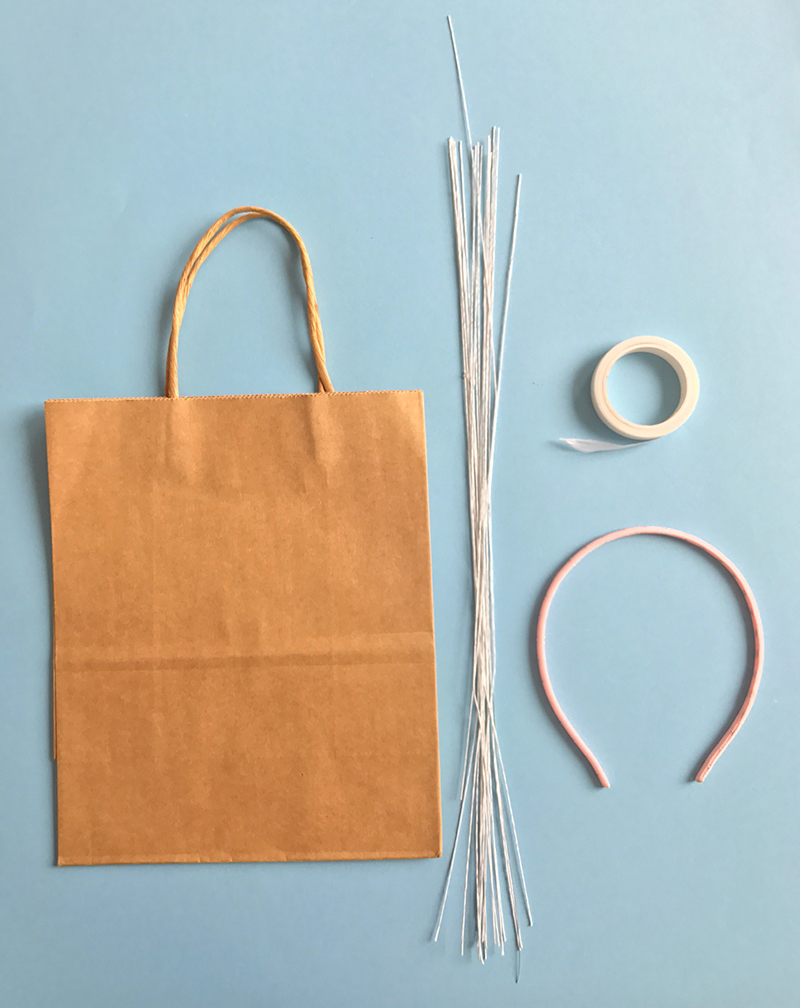
MATERIALS:
• white flower tape
• white flower wire or regular wire works too if you already have
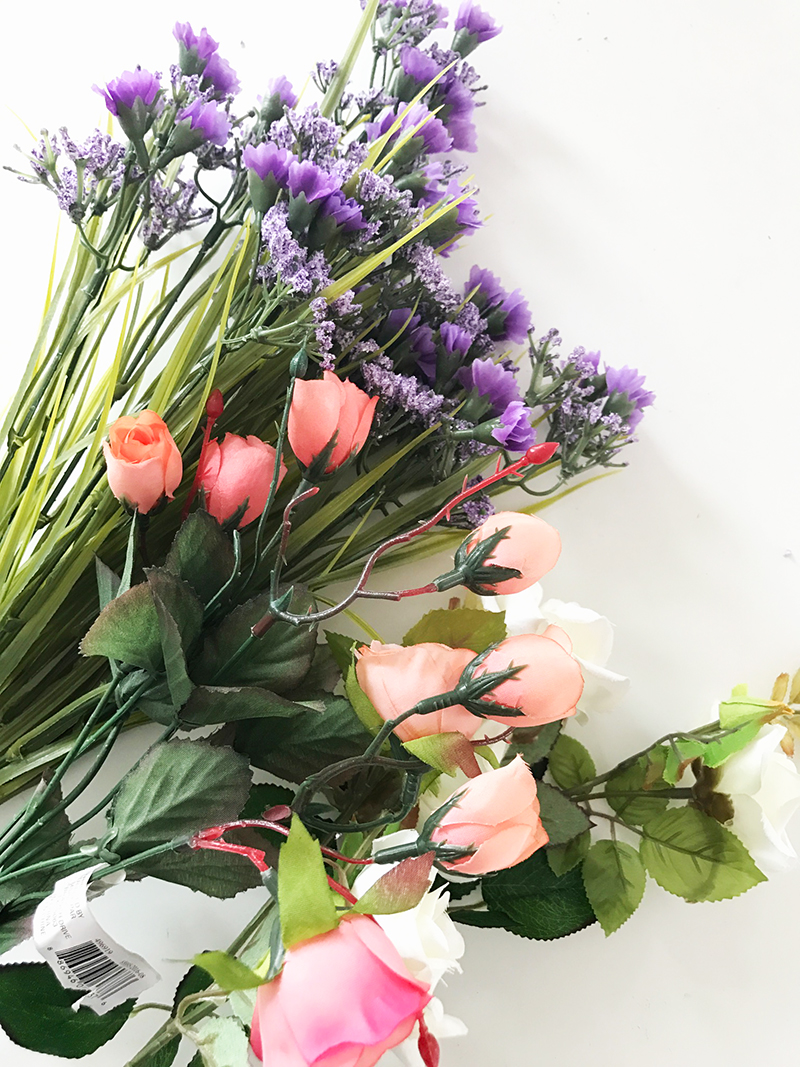
• various faux flowers
• paper gift/shopping bag handles
• thin headband in any colour
• glue gun
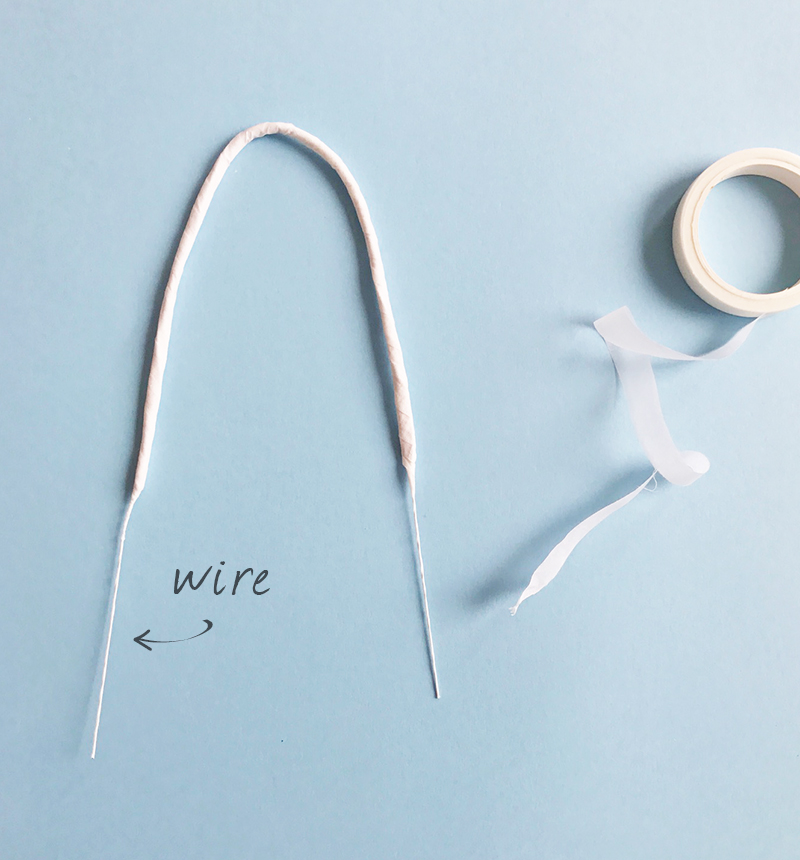
Step 1: Remove the handles from your paper gift bag. This is a great way to recycle part of a bag that was going to end up in the trash. These will be the ears.
Step 2: Cut a piece of wire or use the pre-cut flower wire that’s about 2″ longer on each side than the bag handles.
Step 3: Using the flower tape, place the paper handle and wire together and wrap with 2-3 layers of tape working up and down until it looks completely white. You should have 2″ of wire hanging out on both sides of each “ear”.
Step 4: Do the same thing and wrap 2-3 layers of the tape around the headband until any colour or pattern is hidden and it’s completely white.
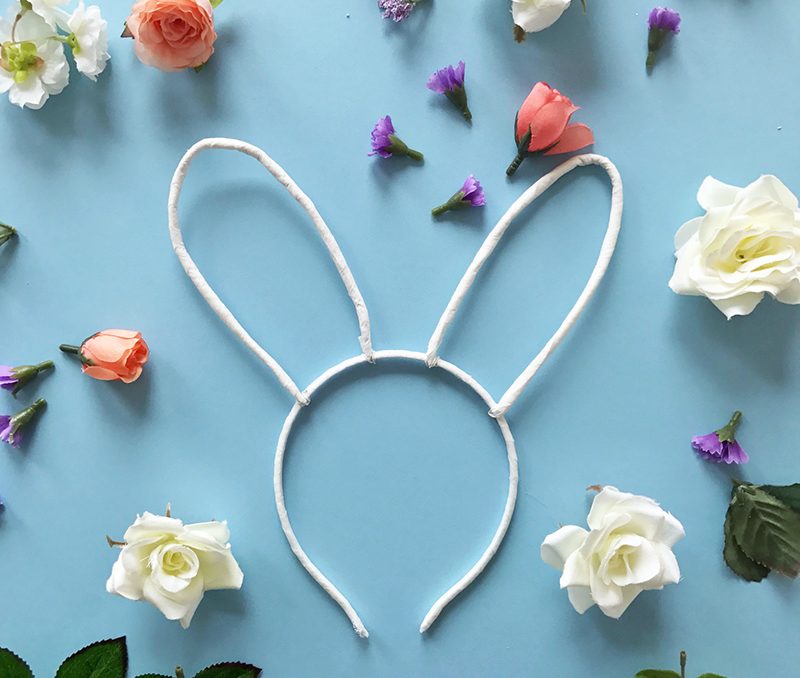
Step 5: Use the wire ends to attach the ears to the headband (above image). If you used regular silver wire, don’t worry too much because it will be covered with flowers.
 Step 6: Remove the buds and some leaves from your faux flowers then adhere them to the headband using a hot glue gun. Try playing around a bit first before committing but don’t overthink it!
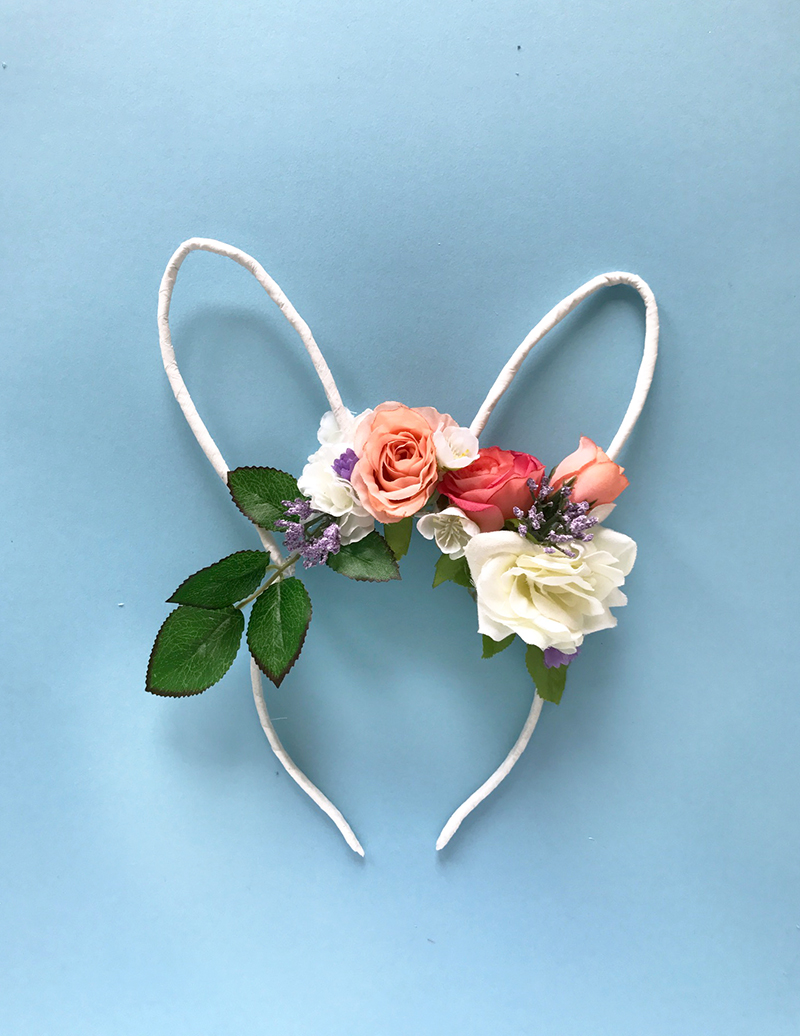
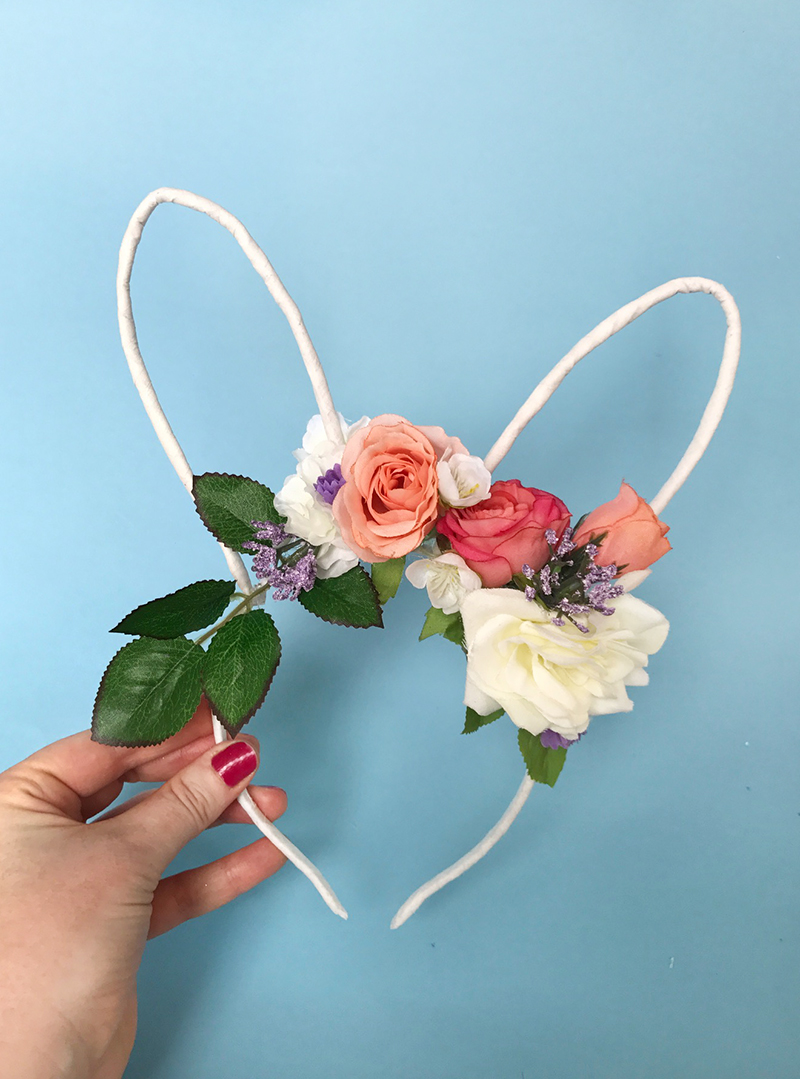
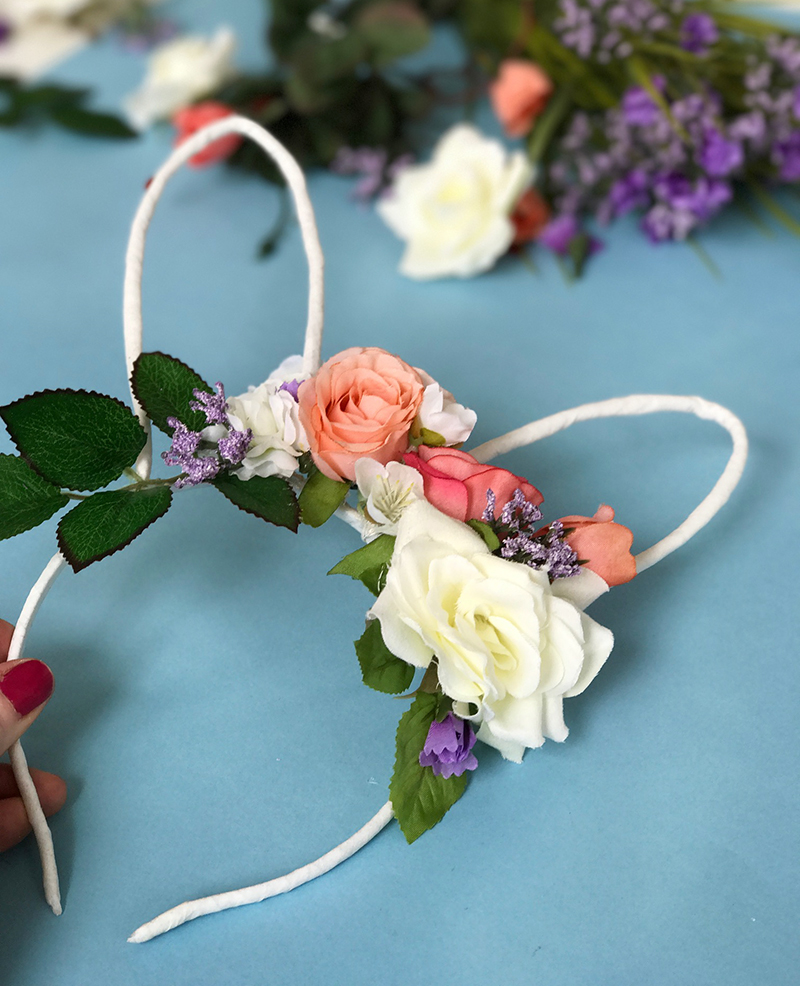 Then you’ll end up with this sweet and pretty piece! Now I admit that sometimes pretty things are just meant to look at but this is toddler approved. I mean don’t let them chew on it or anything but it’s strong enough to withstand a photo session with a toddler to likes to play with everything in sight (or on her head). If you know that your kid has a tendency to chew things then why not get them to listen to some great videos that will distract them so that they sing instead of chew (this is also beneficial as kids learn while singing). So you see there is always an easy solution to help get a cute photo of your kid with some floral bunny ears. There’s plenty of adorable bunny ears out there but if you’re looking for something a bit more whimsical and shall we say *cough cough* classy then these floral bunny ears are for you. Don’t take my word for it, just look at little Zoë. She’s adooooooooorable.
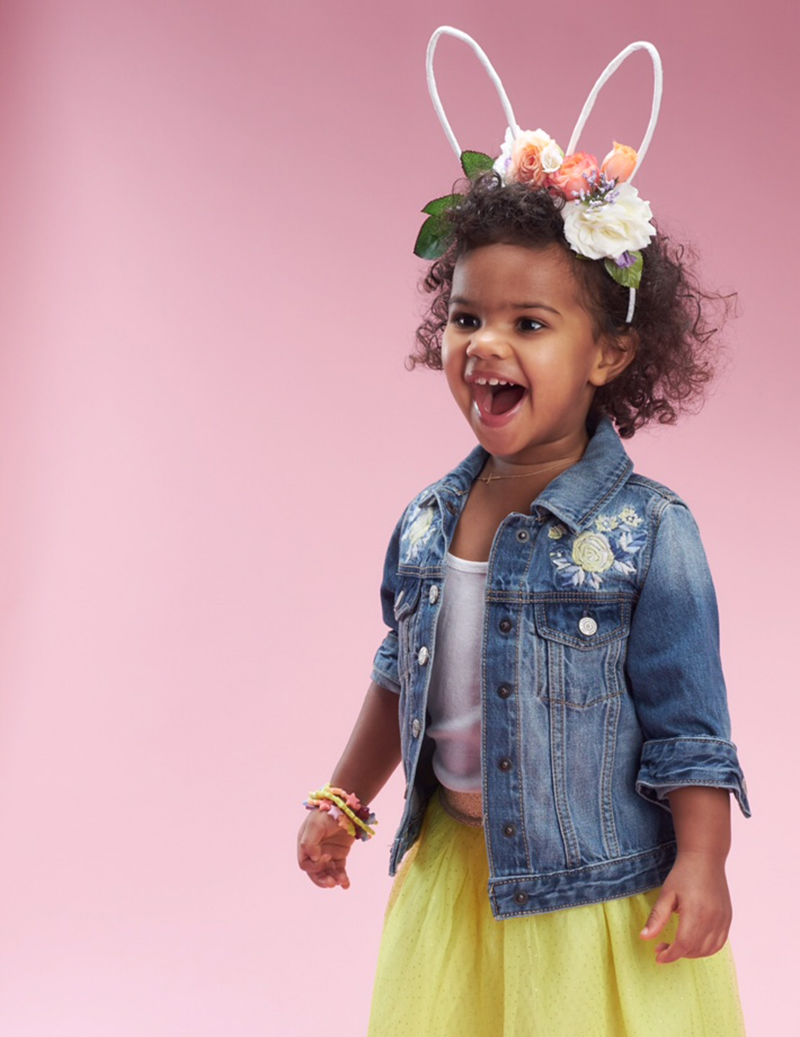
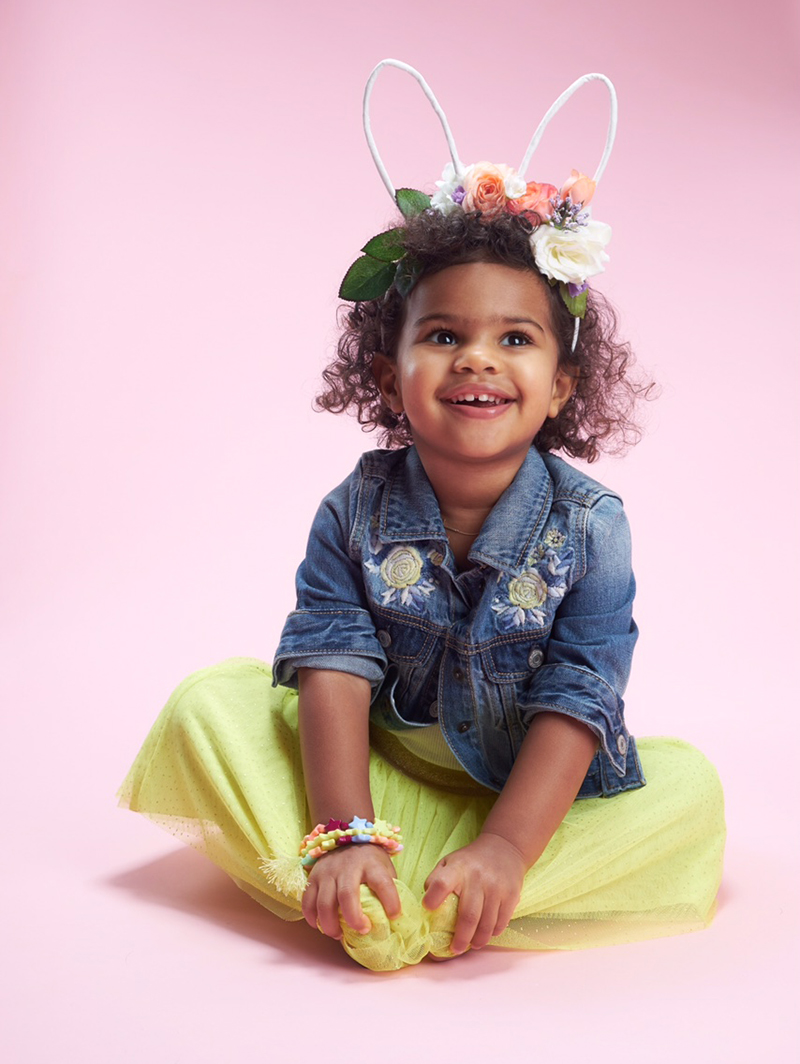 Portrait photography by Brenton Alexander
2 responses to “DIY: Easter Floral Bunny Ears”
Adorable!
Omgosh she’s so adorable makes me smile. I’m definitely making my granddaughter a pair of these thank you for the pattern