 We are on a role people! Two kitchen makeover updates in two weeks, and I even have another one coming before the final reveal at the end of the month. We hit a little speed bump but now we’re zipping along. The idea of creating some DIY kitchen open shelving was there from the start if you check out the original kitchen makeover inspiration so it’s great to see it come to life. I’m calling it ‘faux’ opening shelving because really all I did was remove the cupboard doors and replace the shelves with something prettier. The shelves are not free-standing and I didn’t have to disturb the integrity of the cupboard structure to make it happen. Honestly the DIY kitchen open shelving is my favourite part of the makeover and it’s because it gives me a space to style pretty things.
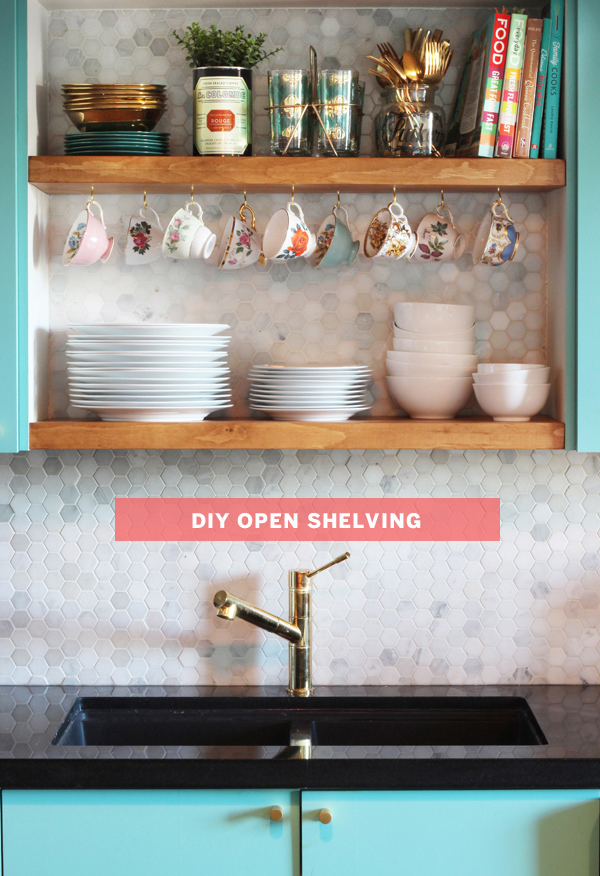
Here’s the before side by side with the after. What a change! Also note that even after 2 years of blogging and a million projects I’m still horrible at documenting the ‘before’ properly.
 So once the cupboards were painted, lights installed, the new counter, sink & faucet were in and the tiling was done, came the beginning of the end with installing these shelves. Oh I also decided to remove the under-the-cupboard lighting. I thought the valance was too clunky and the huge florescent lights weren’t so pretty and out of date. I hope to replace it with something more modern in the near future.
Keep reading to see how I created this stylish little nook.
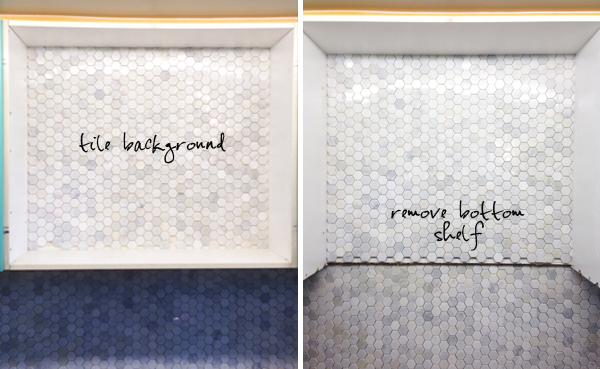
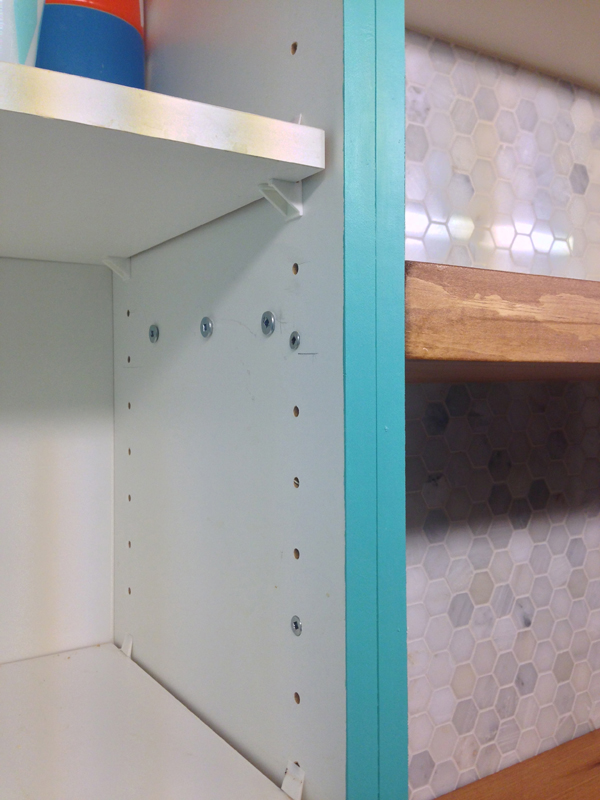
First step was to remove the doors and tile the background to make it look like it was the back wall. Sneaky. Next I removed the bottom shelf. Now there’s probably a less destructive way to do this but at the time frustration was creeping up on me and I kinda just took a hammer to it until it ripped out. Note the horrible holes left behind. I didn’t worry too much about the holes or seam because I knew I was going to use thick shelves to cover it up.
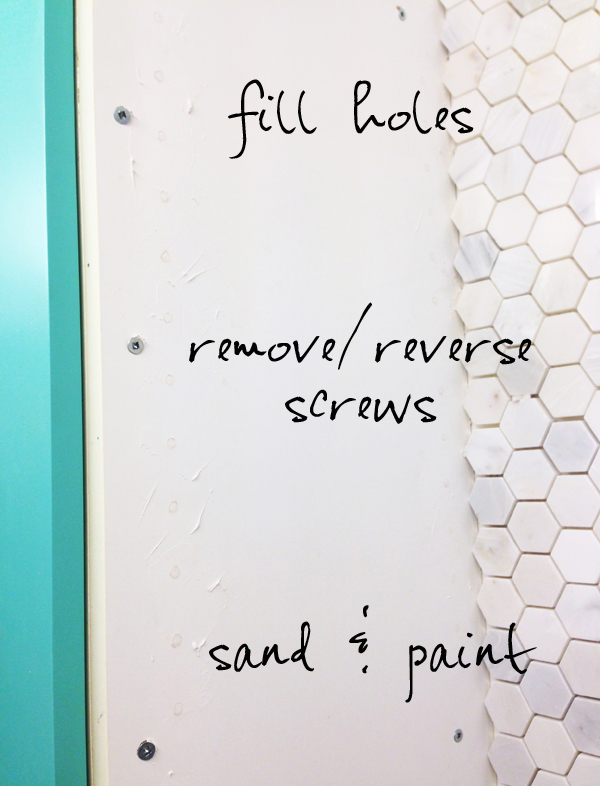
 Then I filled the shelf holes, removed those screws you see and re-screwed them from the inside of the adjoining cupboards then sanded and painted the inside white. No one will ever know it was a cheap cupboard interior!
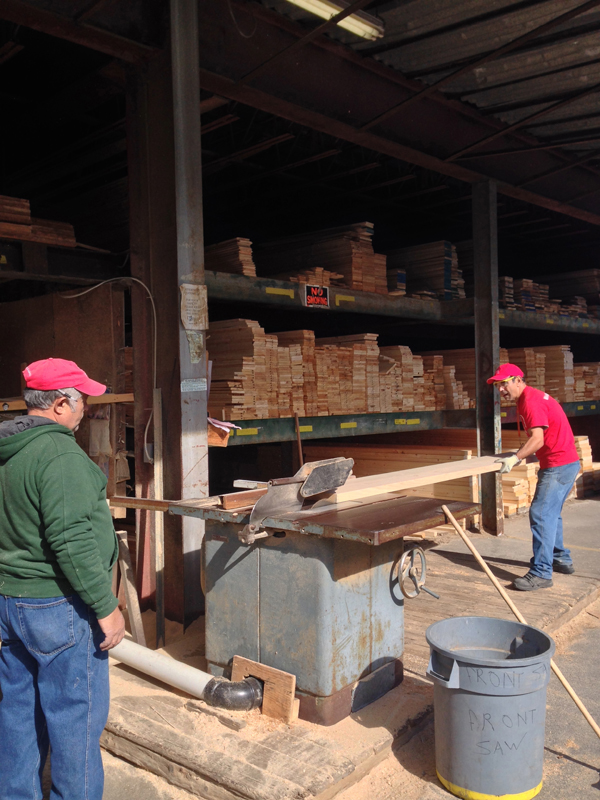
Depending on your measurements and what you’re looking for you may have to go to a lumber yard where they have a few more options and better cutting machines than an average hardware store to get your shelves. Here’s the lumber yard guys cutting down my huge piece of 2″ finished pine. Make sure they pick out a nice piece for you. Bat your eyelashes and smile, works every time.
 Then comes the sanding, staining & sealing. Trust me, I hate doing this stuff. Like HATE it. If I had someone to do it for me or could buy them finished in the size & colour I need, I would have. But that would be way too easy. Now I can say I know how to do it and then brag about it at parties.
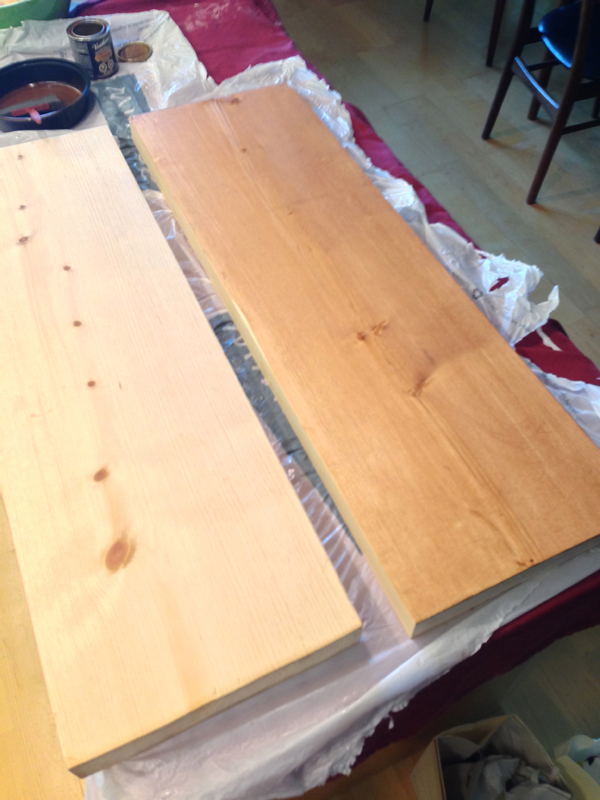
The wood was already finished so I just gave it another extra fine sanding then – and this is important – apply a coat of wood conditioner . If you don’t do this your stain will come out all gross and patchy, like a bad hair dye job. After following the drying instructions I applied two light coats of Varathane oil-based stain in Ipswich brown. Lastly I applied 3 coats of polyurethane in a satin finish (there’s also gloss and semi-gloss). There’s water-based and oil-based product, whichever you choose just make sure you buy the same across the board.
Now I didn’t know this at the time but there’s an alternative product that you can use that both stains & seals in one step (!) but of course I didn’t find out about it until after I did this project. I’ll tell you more about that miracle product when I show you my butcher block island counter update next week.
Next, use good quality wood screws to install the shelves. I suggest using 3 screws for each side – so 12 screws in total for this.
I have to say, it was tricky at times to do this project completely on my own, I could’ve definitely used an extra set of hands for certain steps but after some major cursing and a few frantic photo text messages to more knowledgable friends I was super happy with the end result and proud that I did it myself. Then the best part – time for styling!!! I was so happy to have a place to show off a few of my vintage treasures.
Oh and how about that sexy new faucet? Nothing like the best kitchen faucets to make my kitchen sexier. Am I ballin’ or what?! Don’t ever underestimate how hard it is to find a brass faucet that’s under 13″ high. Thankfully I found this beauty on Wayfair (in Brass). Now you watch, brass faucets will be all cool and sold at Ikea next year. Well here’s my proof that I was the first to be cool. And if they don’t become cool then I’m just a big nerd with an obsession for gold faucets.
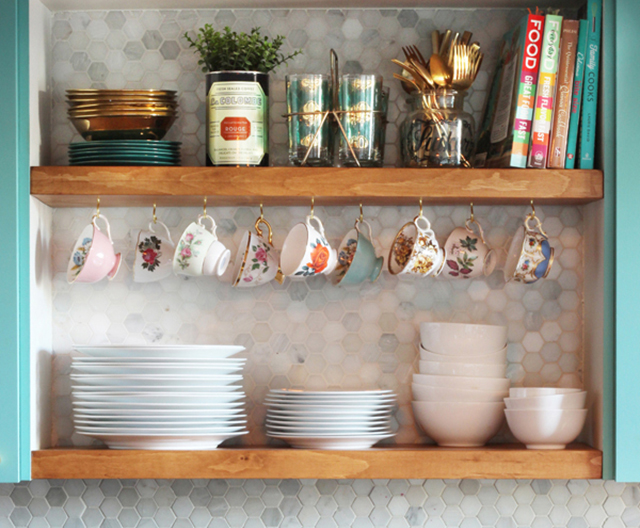
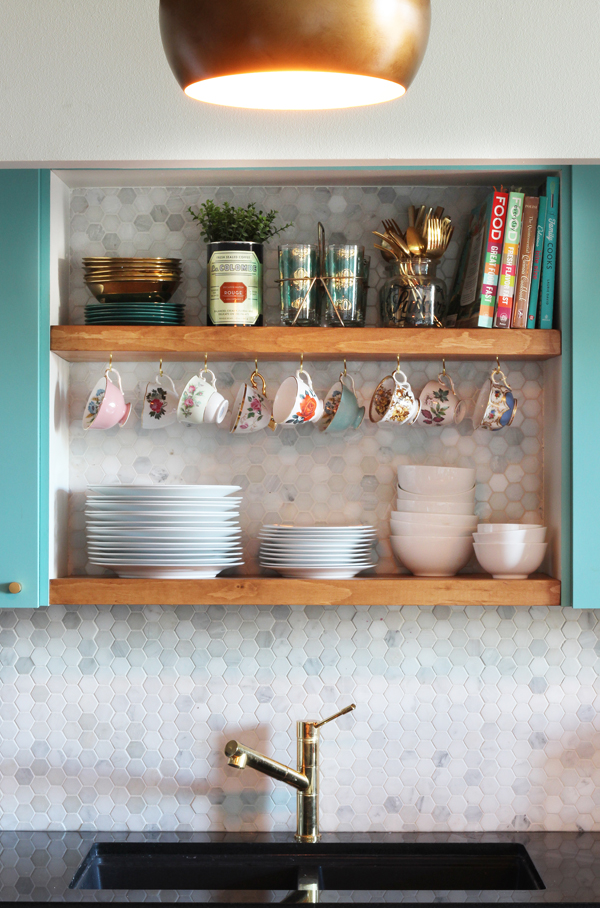
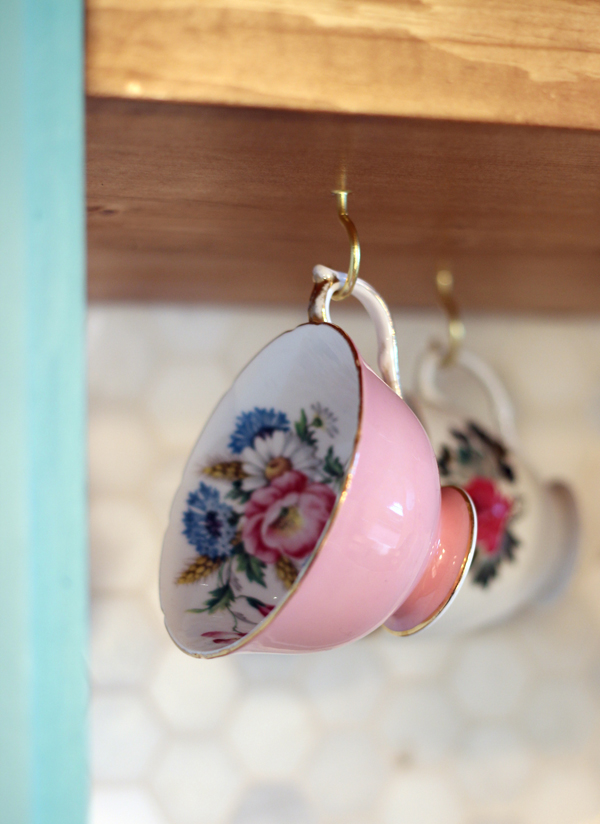
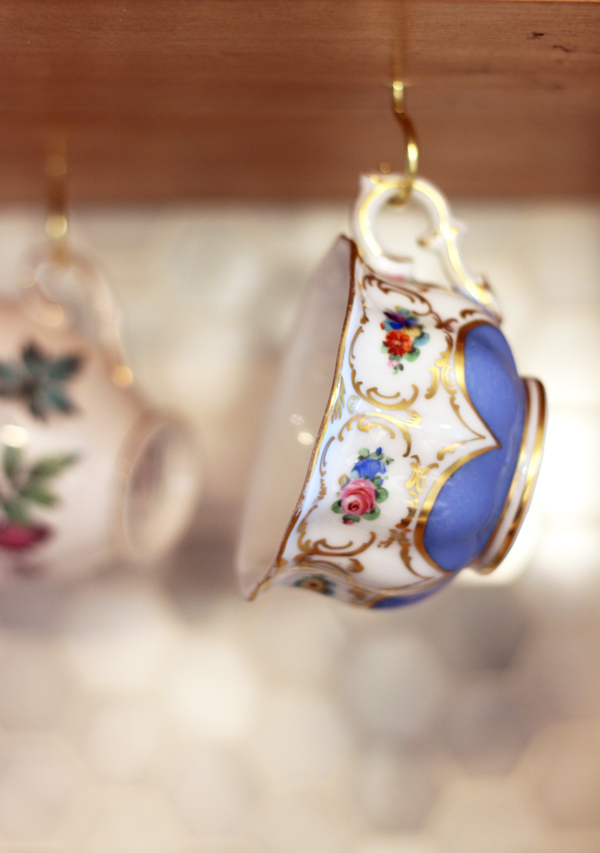
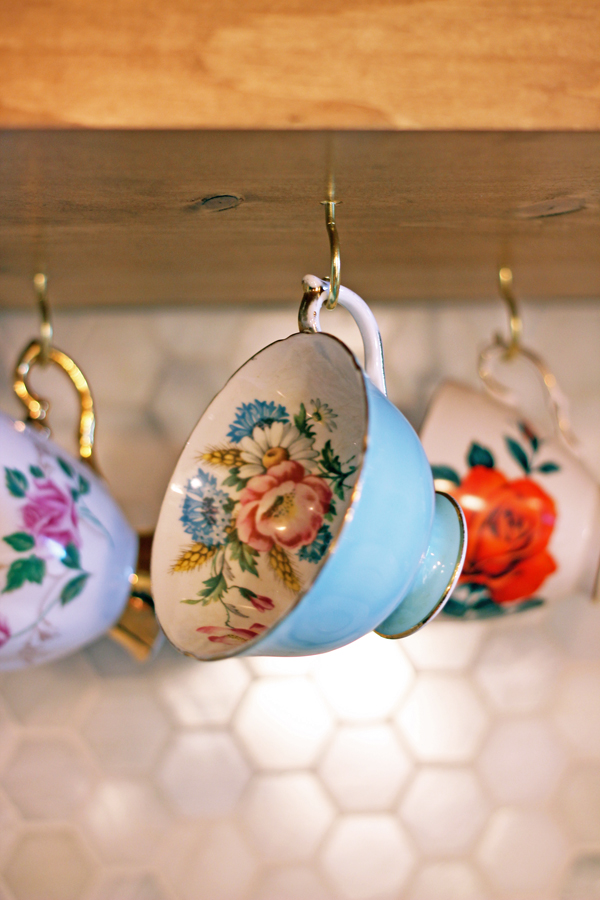
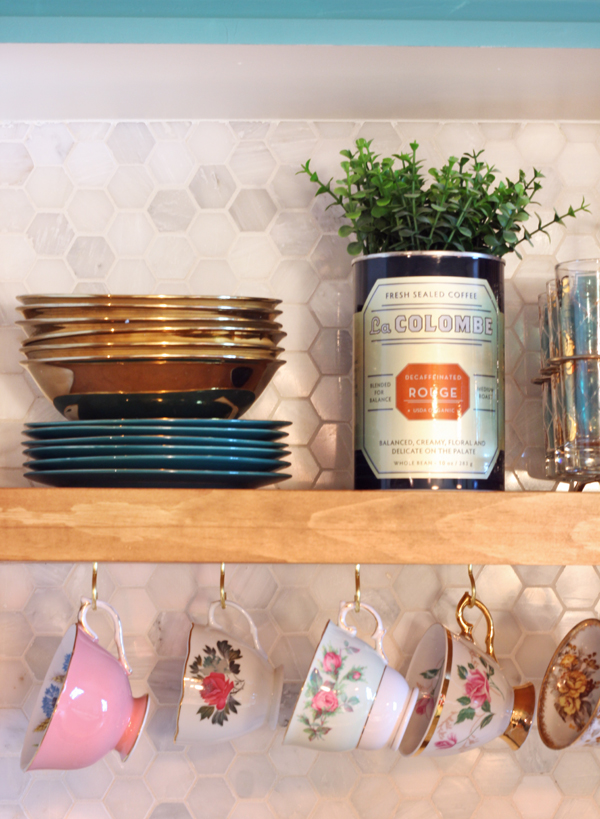
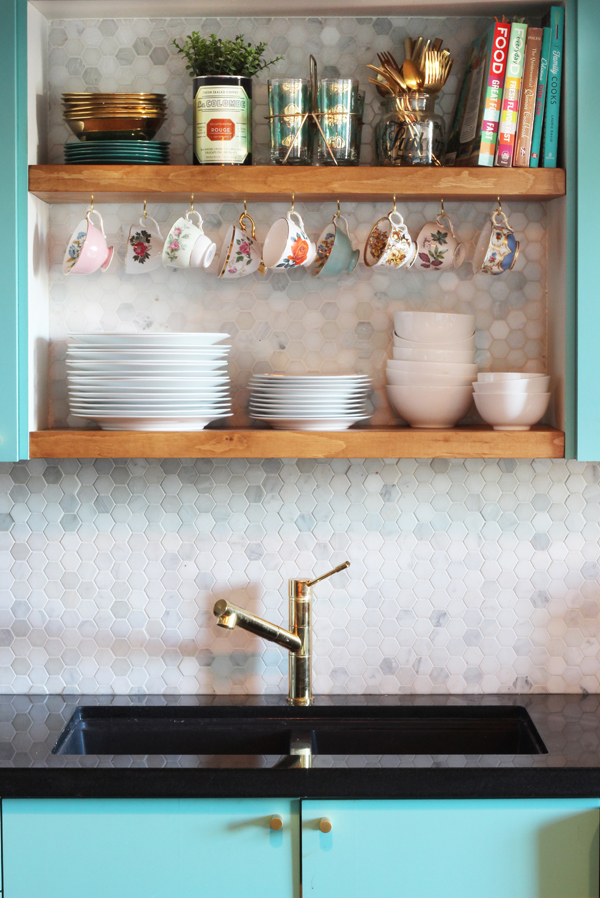
You know how they say sometimes good things come out of failures? Well because I had to use such a thick wood for the shelves I actually lost one row. I was kinda bummed because I really wanted the display space. But because of that issue I came up with the idea of the hanging tea cups and I love them!
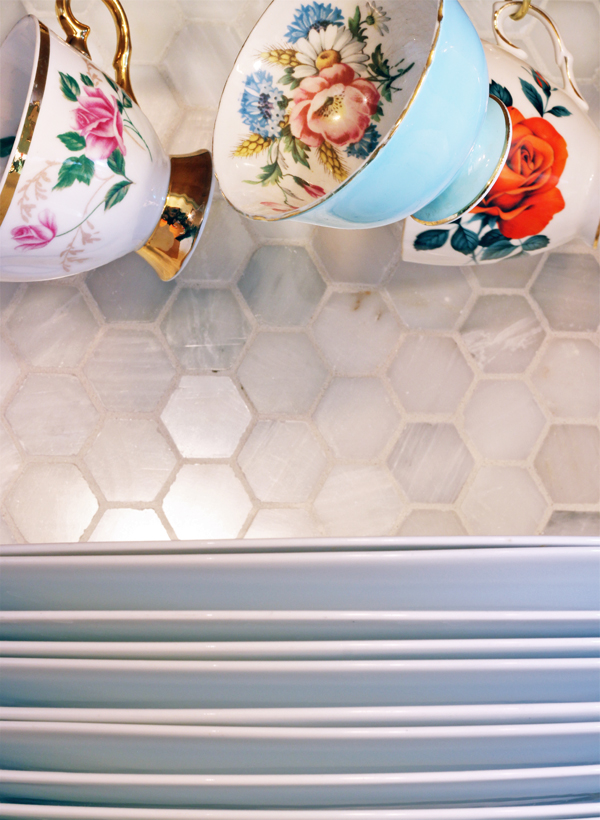
They’re all tea cups I found at thrift shops (of course). I love how they add an element of vintage character and colour in contrast to the modern marble tiles and white dishes. Obviously they are great for tea but how fab would they be for cappuccino? Now I just need a cappuccino machine…….
 On the top shelf is where you’ll find a mixed collection of pretty things.
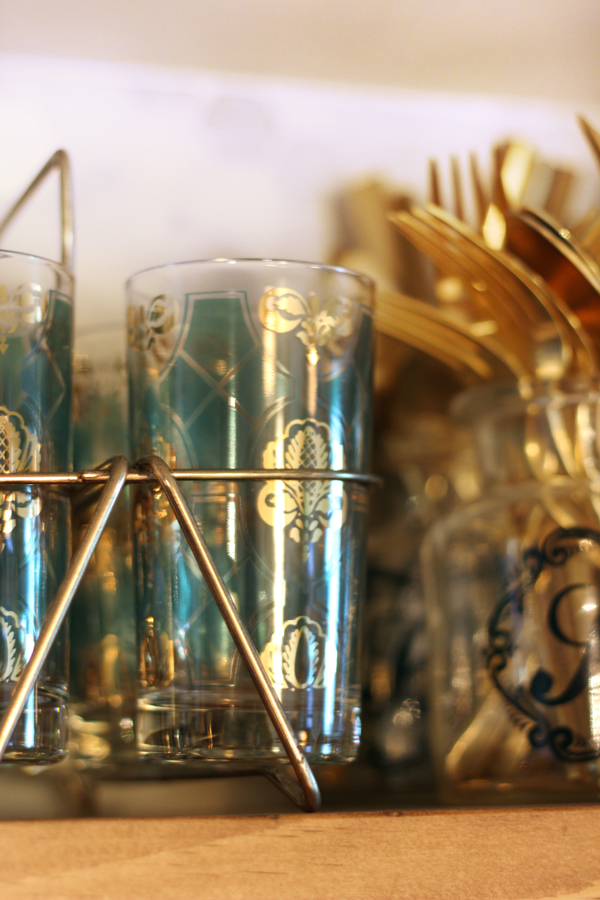
The vintage glass set is my grandma’s. I was one of the last grand children to get to select any momentos after she passed and I couldn’t believe that none of my 16 cousins scooped these beauties up. It was a sign that they were meant to come live with someone who would love them and put them on display.
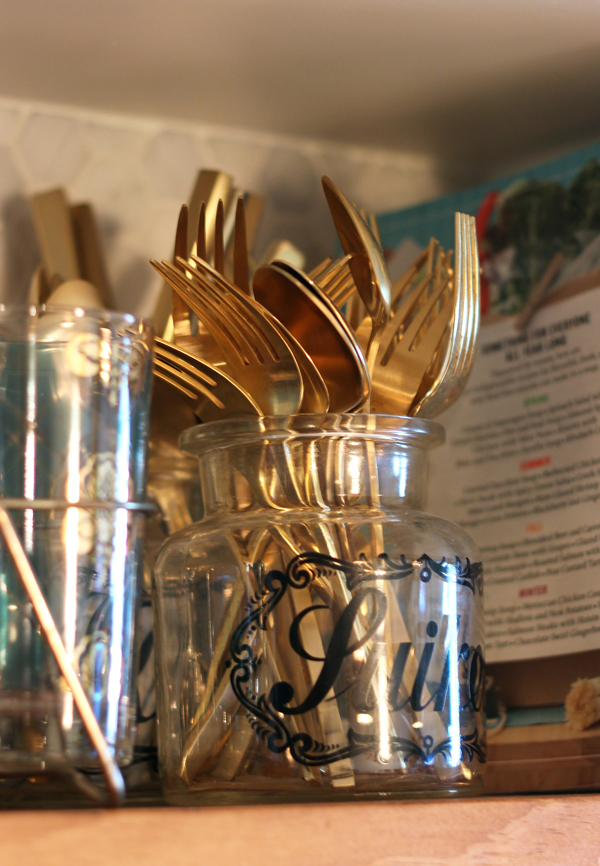
This set of jars with some pretty script in Dutch (i think) was a thrift shop score from years ago that I filled up with my West Elm gold flatware. I also saved this vintage-inspired tin from coffee I picked up at West Elm. The plant is fake but assuming that most people won’t be taking extreme close-up photos of it, I think it will pass.
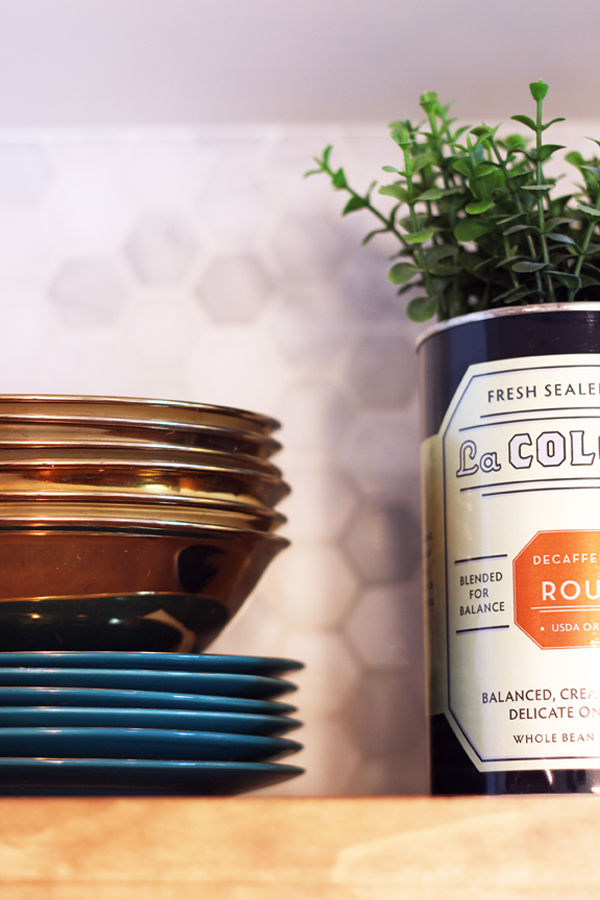
You may recognize the turquoise plates from this Value Village trip a while back. They finally have a place to be displayed and I found the gold bowls on clearance for $3 each (!) at Homesense. As if no one wanted them.
I just love looking at my new open shelving. It makes me smile. It also adds about 100x more character to the kitchen. Let this be inspiration to show you that you don’t have to totally gut your kitchen or pay a small fortune to get the open shelving look. If I can do it, you can do it! Even if there’s cursing involved.
If you like this click here to see all of my kitchen makeover updates so far. Stay tuned for the updated kitchen island and the final reveal!
11 responses to “KITCHEN UPDATE: DIY Kitchen open shelving”
Love love love x100!!!!!! Everything – the turquoise, wood, marble, vintage goodies, etc etc. Not one thing I don’t dig, girl!! Nice work.
Also – on the topic of brass faucets. Ikea did sell a tall rounded kitchen one a while back (before brass was in again) and I scooped it up on clearance for about $30! Bet they are regretting discontinuing it now..! :)
Thanks Gemma! And thanks for the IKEA tip but I think I’ve done enough gold faucet searching to last a lifetime!
High five, Melissa! Love the little tour you gave us. And the teacups – so darn pretty! Nicely done!
Thanks Jordana! You’ll have to come over for tea sometime :)
You are all set to have a tea party!
They look AWESOME! You did such a great job!!
Thanks Kristen! Used some old fashioned muscle to get those last screws in but it was worth it.
Oh my word, the anticipation! It looks soooo good!! Cna’t wait to see the final shots, great job so far!
Thanks Virginia! Final reveal coming soon….
How awesome! What was the distance/spacing on how you hung your tea cups? Are they staggered or two rows? I’m looking to build something similar and not sure how much space to leave between hooks.
Hi Lo – there’s two rows, which are staggered from each other. I left 6″ between the hooks.